How to Upgrade an IKEA Dresser- The Easy Way!
Upgrading Our Boys Ikea Hemnes Dressers
Ikea dressers are hard to get away from, which is why I found myself brainstorming ways to do an Ikea dresser upgrade when I started to put our boys room together. Last summer, when we moved into our home in North Carolina we wanted to get new dressers for our kids but anytime I looked online or in stores I never wanted to spend the money on them…especially when they likely would get beat up by my wild kids.
Sometimes as a Mom I feel like its easier to not buy nice things so I don’t get mad if/when they get destroyed. Anyone else?! Recently, there are certain areas of our home I feel I can keep under control better than others. Unfortunately, the kids rooms are not one of them. So we kept the Ikea dressers and I decided to do an easy Ikea dresser upgrade.
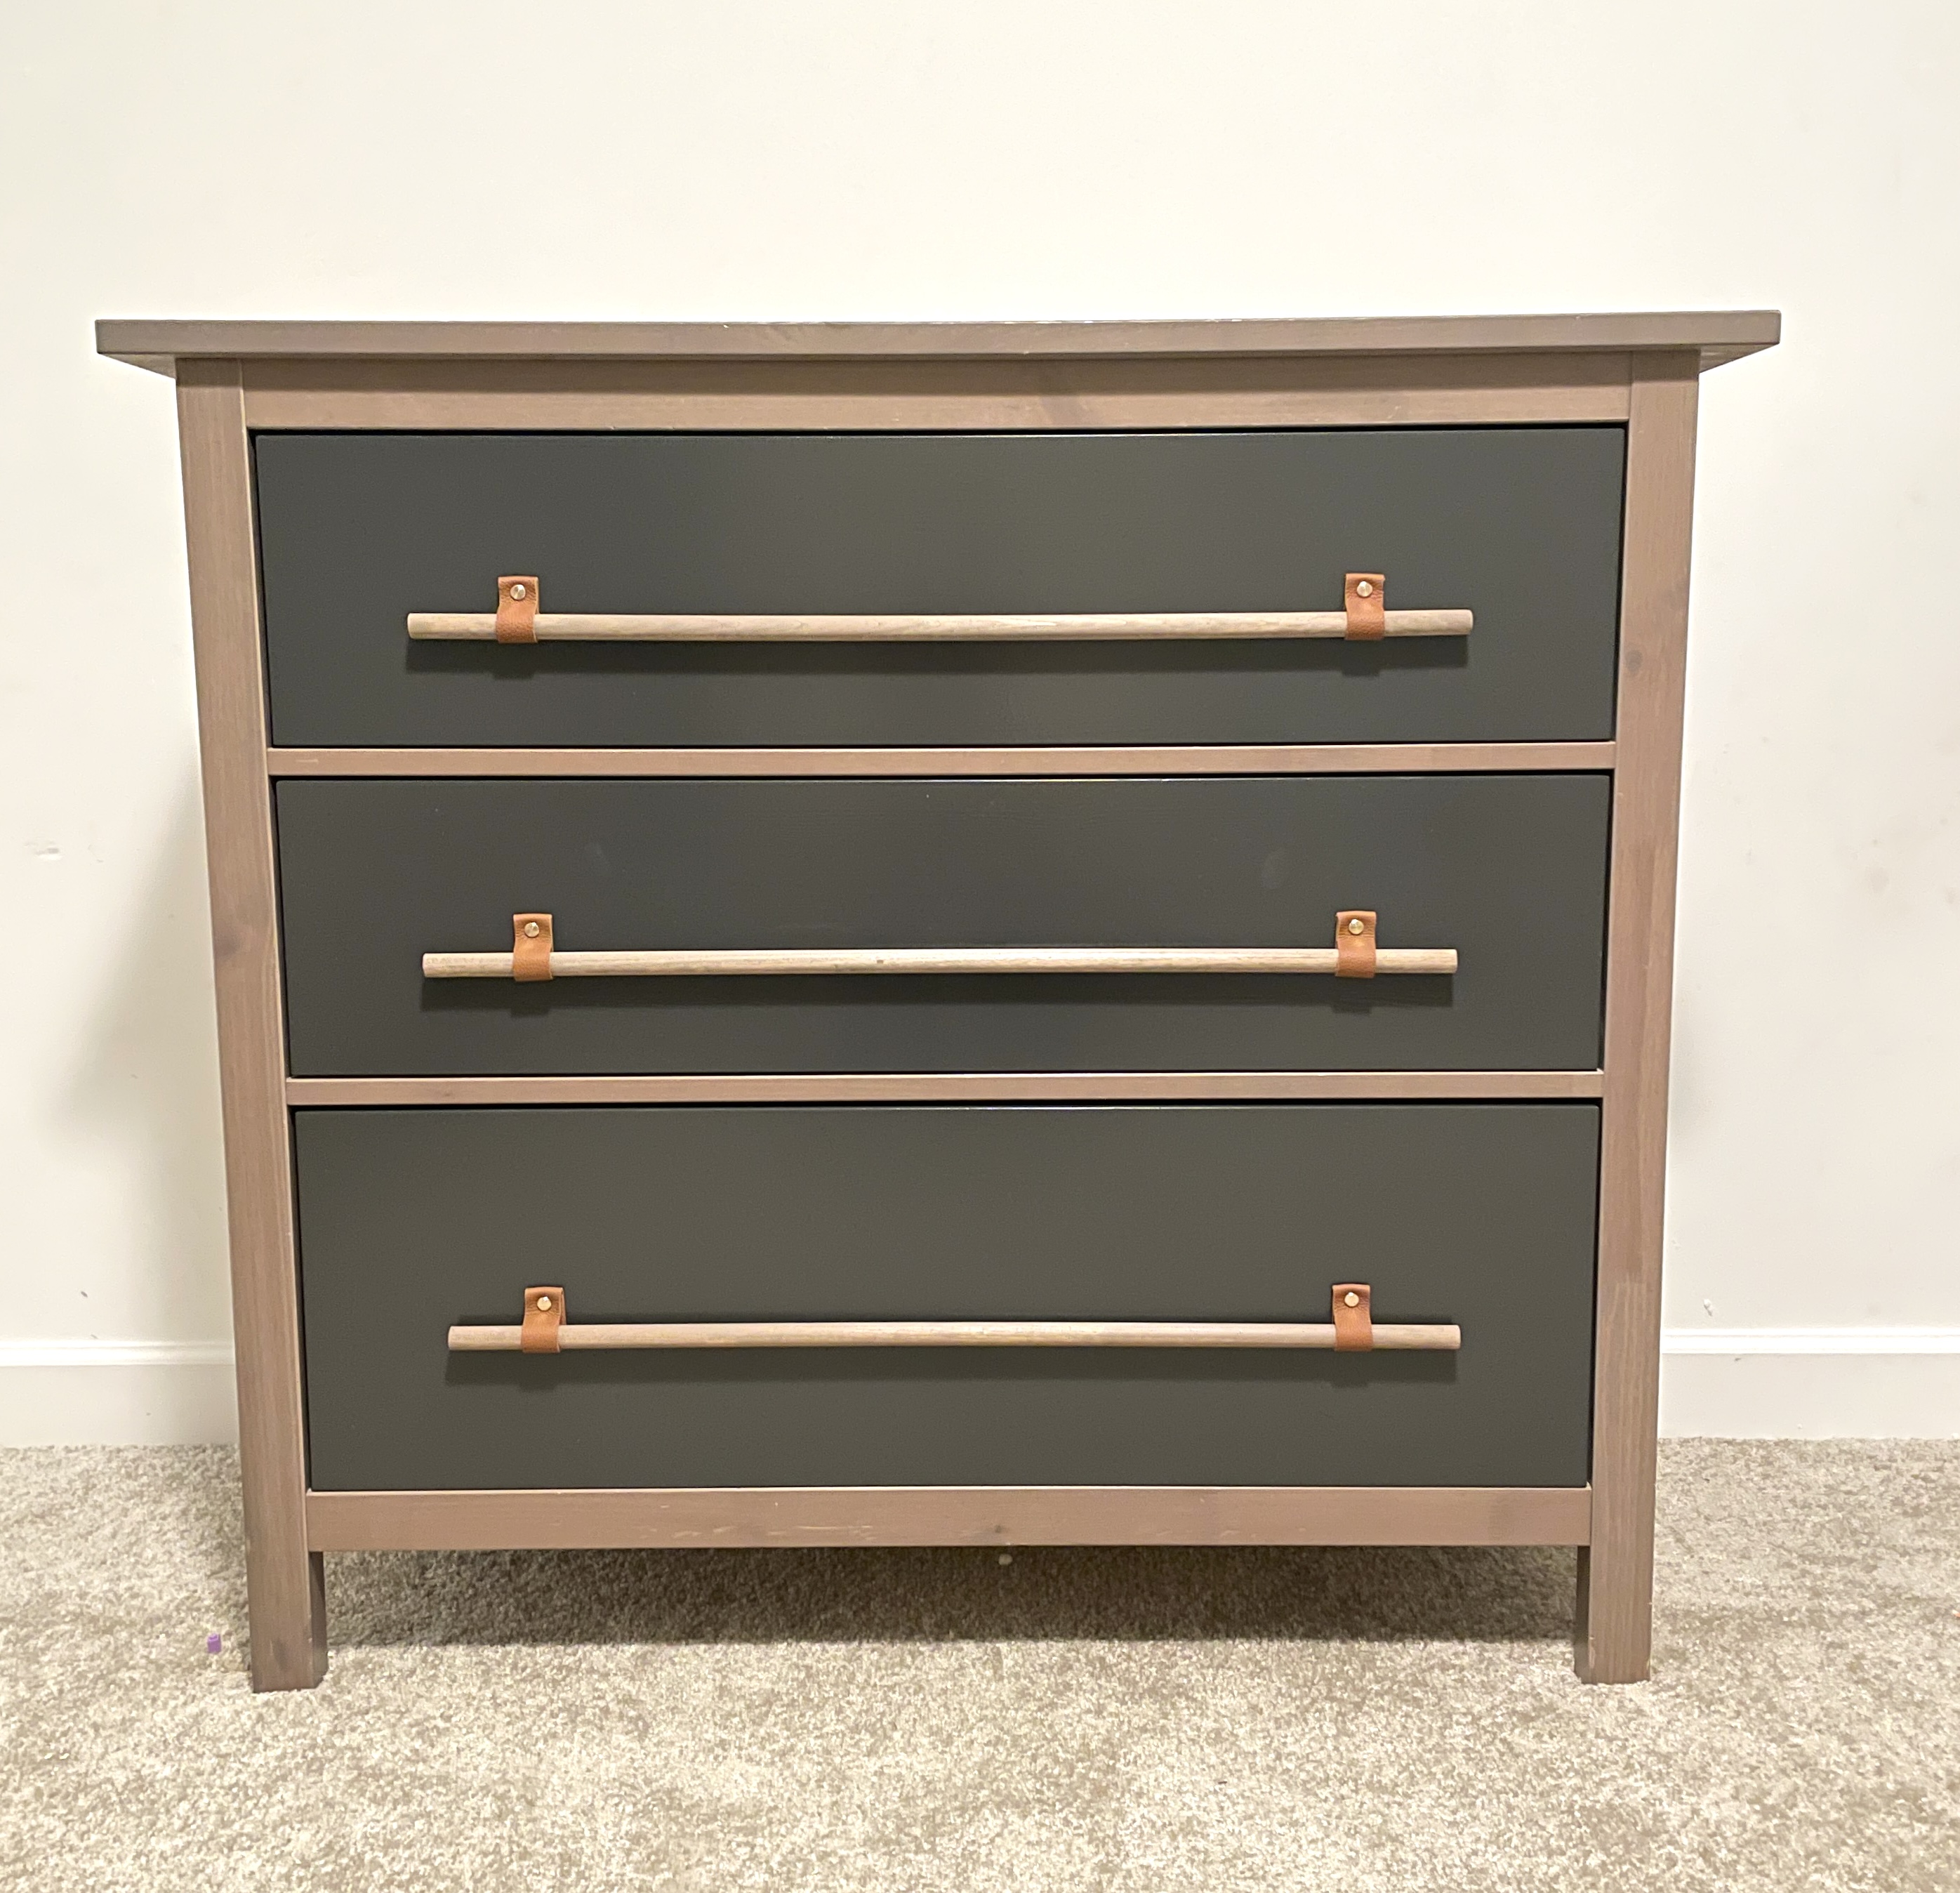
Luckily, two tone furniture is very on trend right now so I took advantage of this trend and for the upgrade I only painted the drawer fronts as opposed to the entire Ikea dresser.

Supplies to Upgrade an Ikea Dresser
– 220 Grit Sanding block
– Bonding Primer….this is my favorite
– Paint
– Roller for smooth surfaces or foam roller
– 5/8 inch 6 ft. dowel
– leather drawer pulls. I bought these ones.
– leather punch (optional)
– original Gorilla Glue (optional)
Directions to Upgrade an Ikea Dresser {the easy way}
1. Start by removing the drawers from the dresser and removing the hardware.
2. Next, quickly sand down the drawer fronts and with 220 grit sandpaper.
3. Now, wipe the drawers down and prime with BONDING primer. Bonding Primer is especially important for Ikea, or any hard to stick, furniture. I used this Bonding Primer.
For this step, I did two thin coats of primer. You could also get away with one coat but I prefer two for better paint adhesion. I let it dry 1 hour between coats. This is when I watch Netflix 🙂
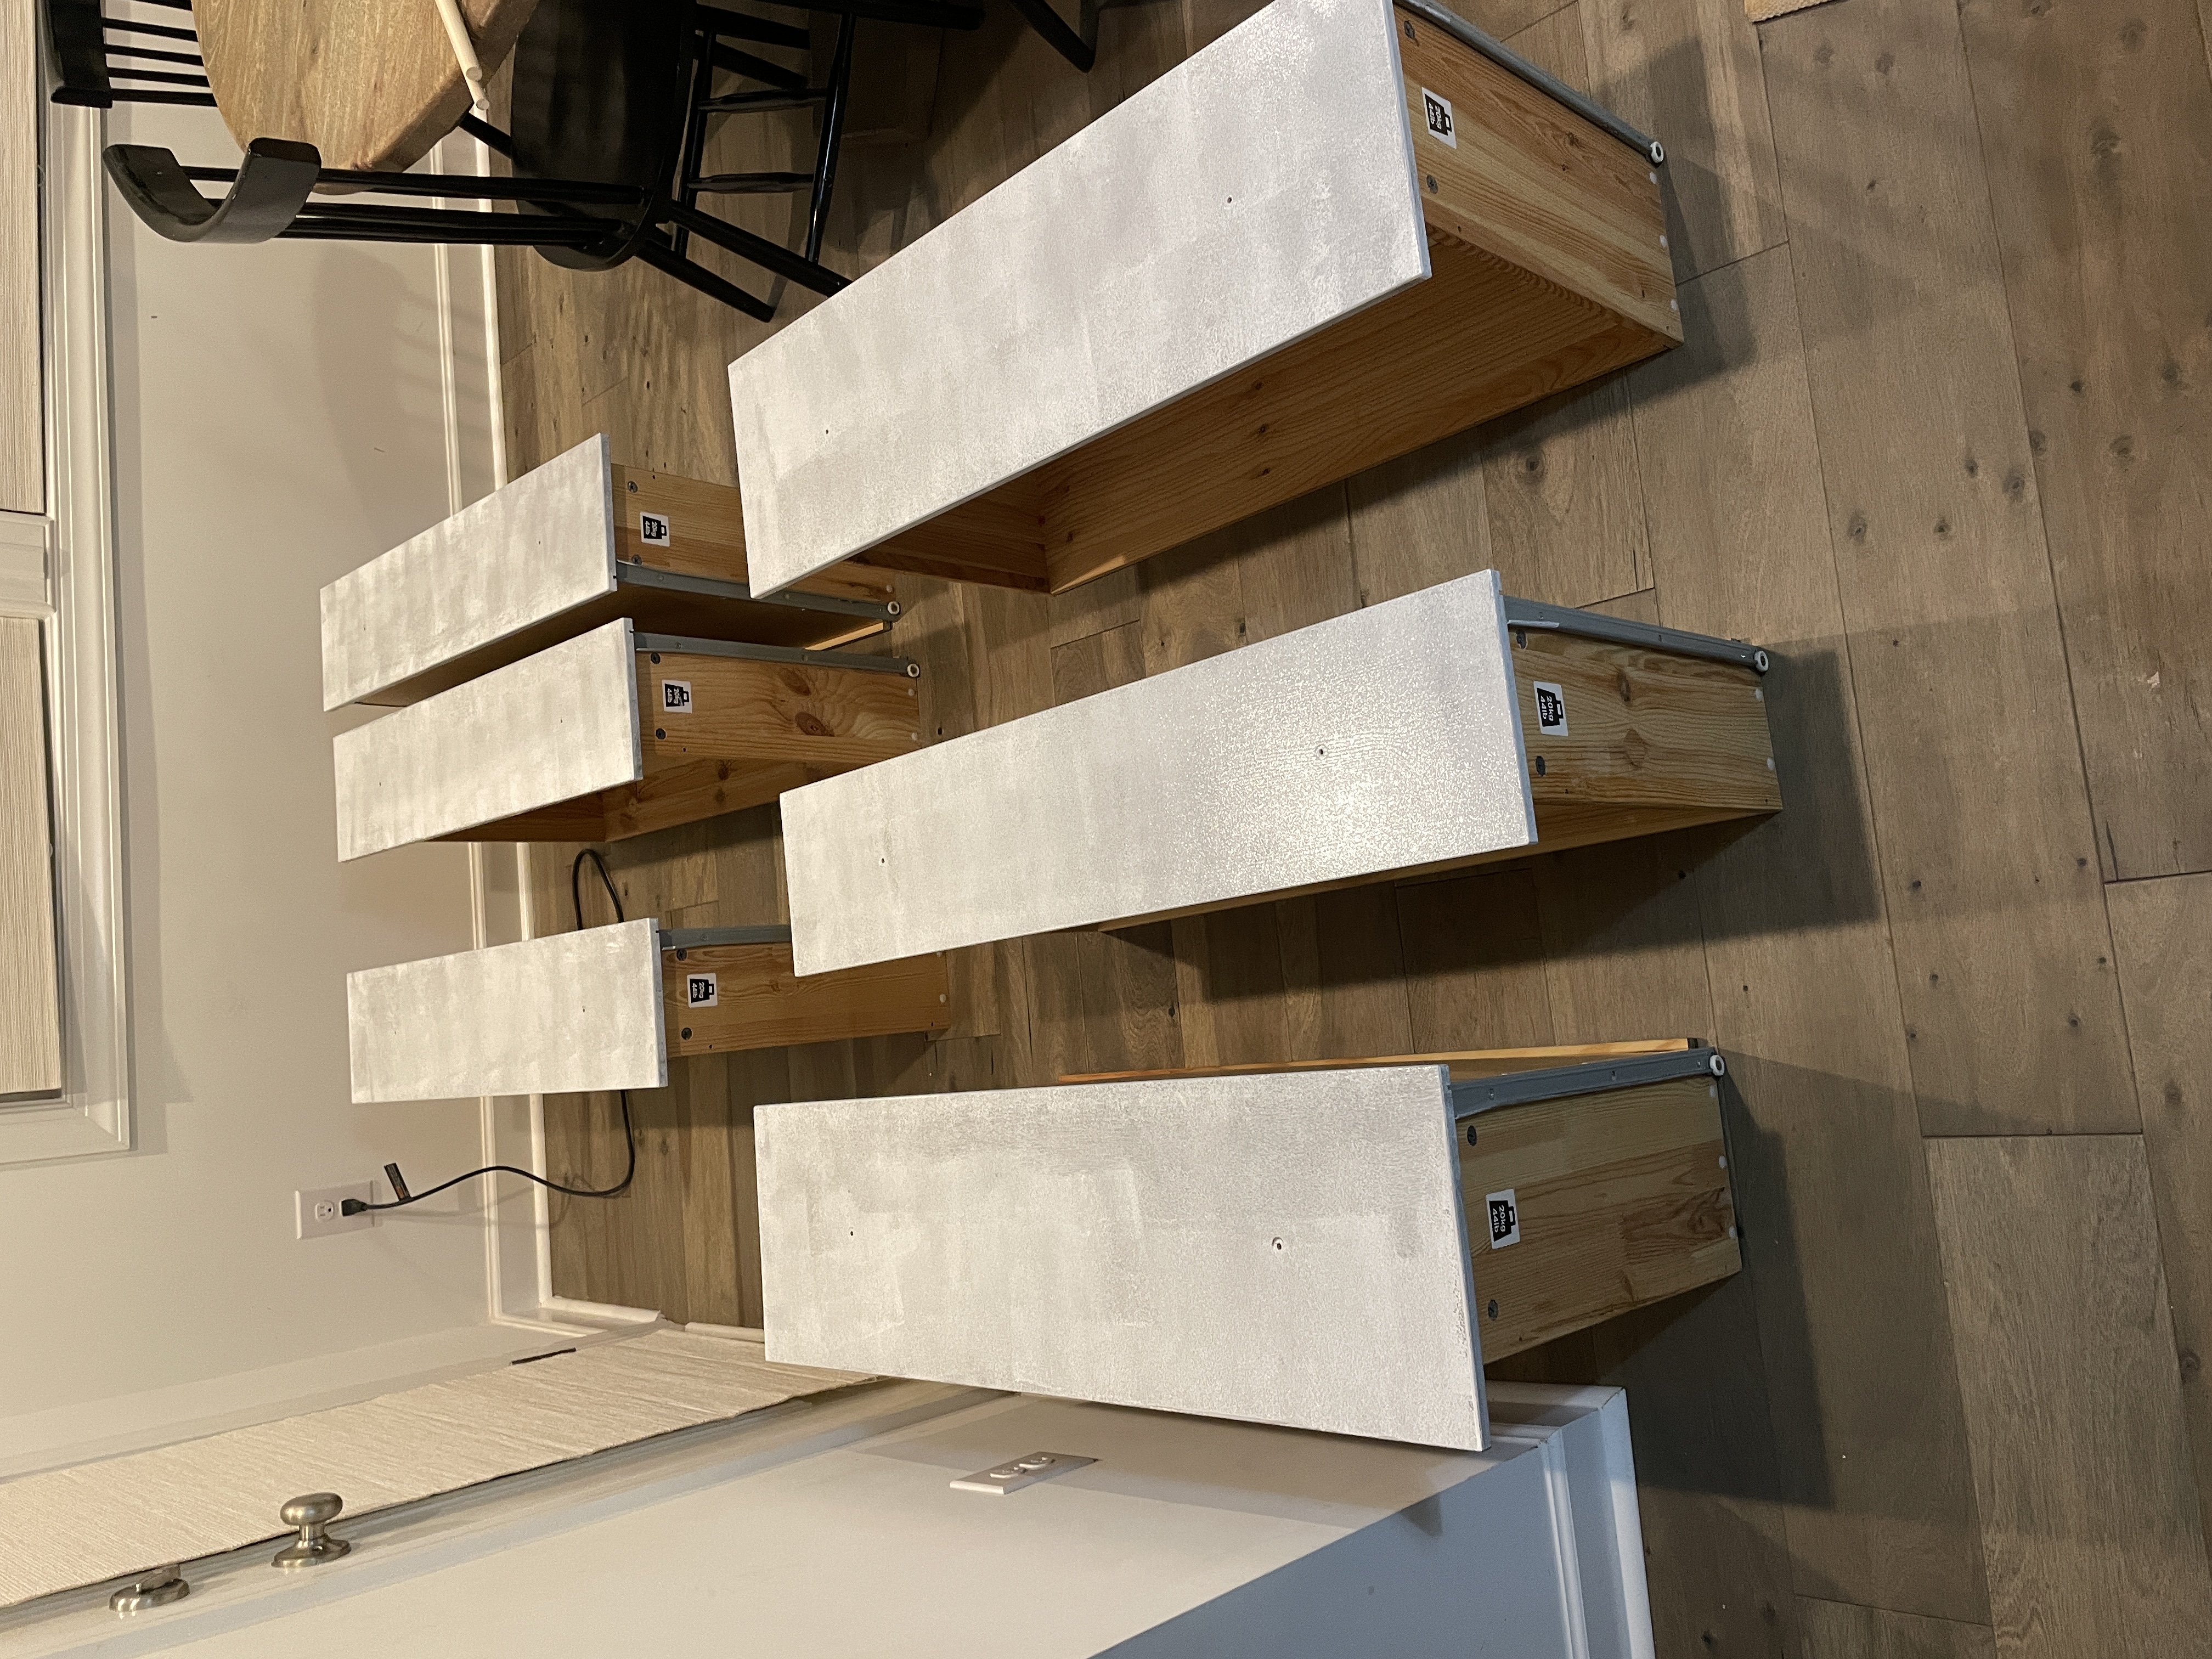
4. Paint! I used leftover cabinet paint from Sherwin Williams. It will definitely provide the best durability since it is an enamel. But I used it because it was leftover from a previous project. Otherwise, I wouldn’t have spent the extra money on it. It took two coats.
5. Next, I cut and stained the dowels. I cut them to 32 inches. Then I sanded the edges to keep them smooth. Lastly, I stained them with one coat of flagstone stain. Because it was just the smooth dowels, I didn’t bother with pre conditioner and it went great.
5. After the fronts are dry, install the leather pulls. I did end up buying a leather punch because I wanted my pulls smaller than what the existing holes provided, to keep the dowel in more securely. The punch was only $5 at home depot. However, you can always skip that part and use the existing holes, the leather just won’t wrap as tightly around the dowel.

6. Lastly, put the wooden dowels through the leather pulls and add a drop of Gorilla Glue on the inside of each pull to keep the dowel very secure.
7. Install!