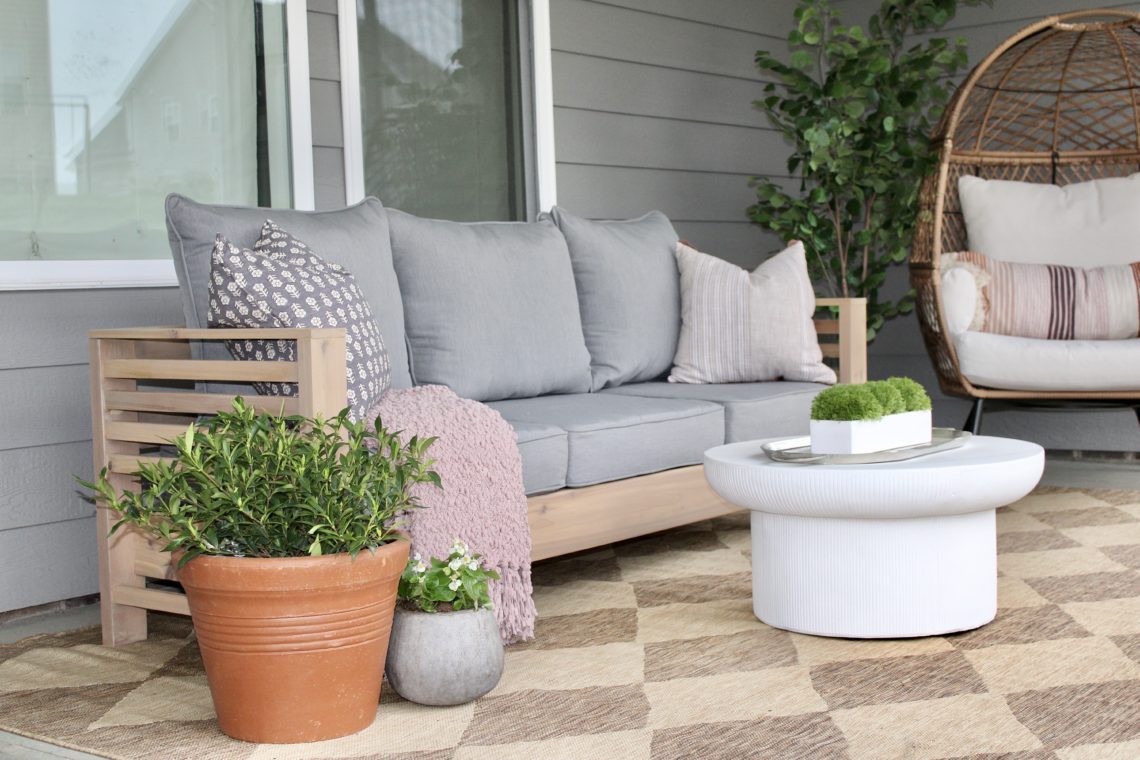
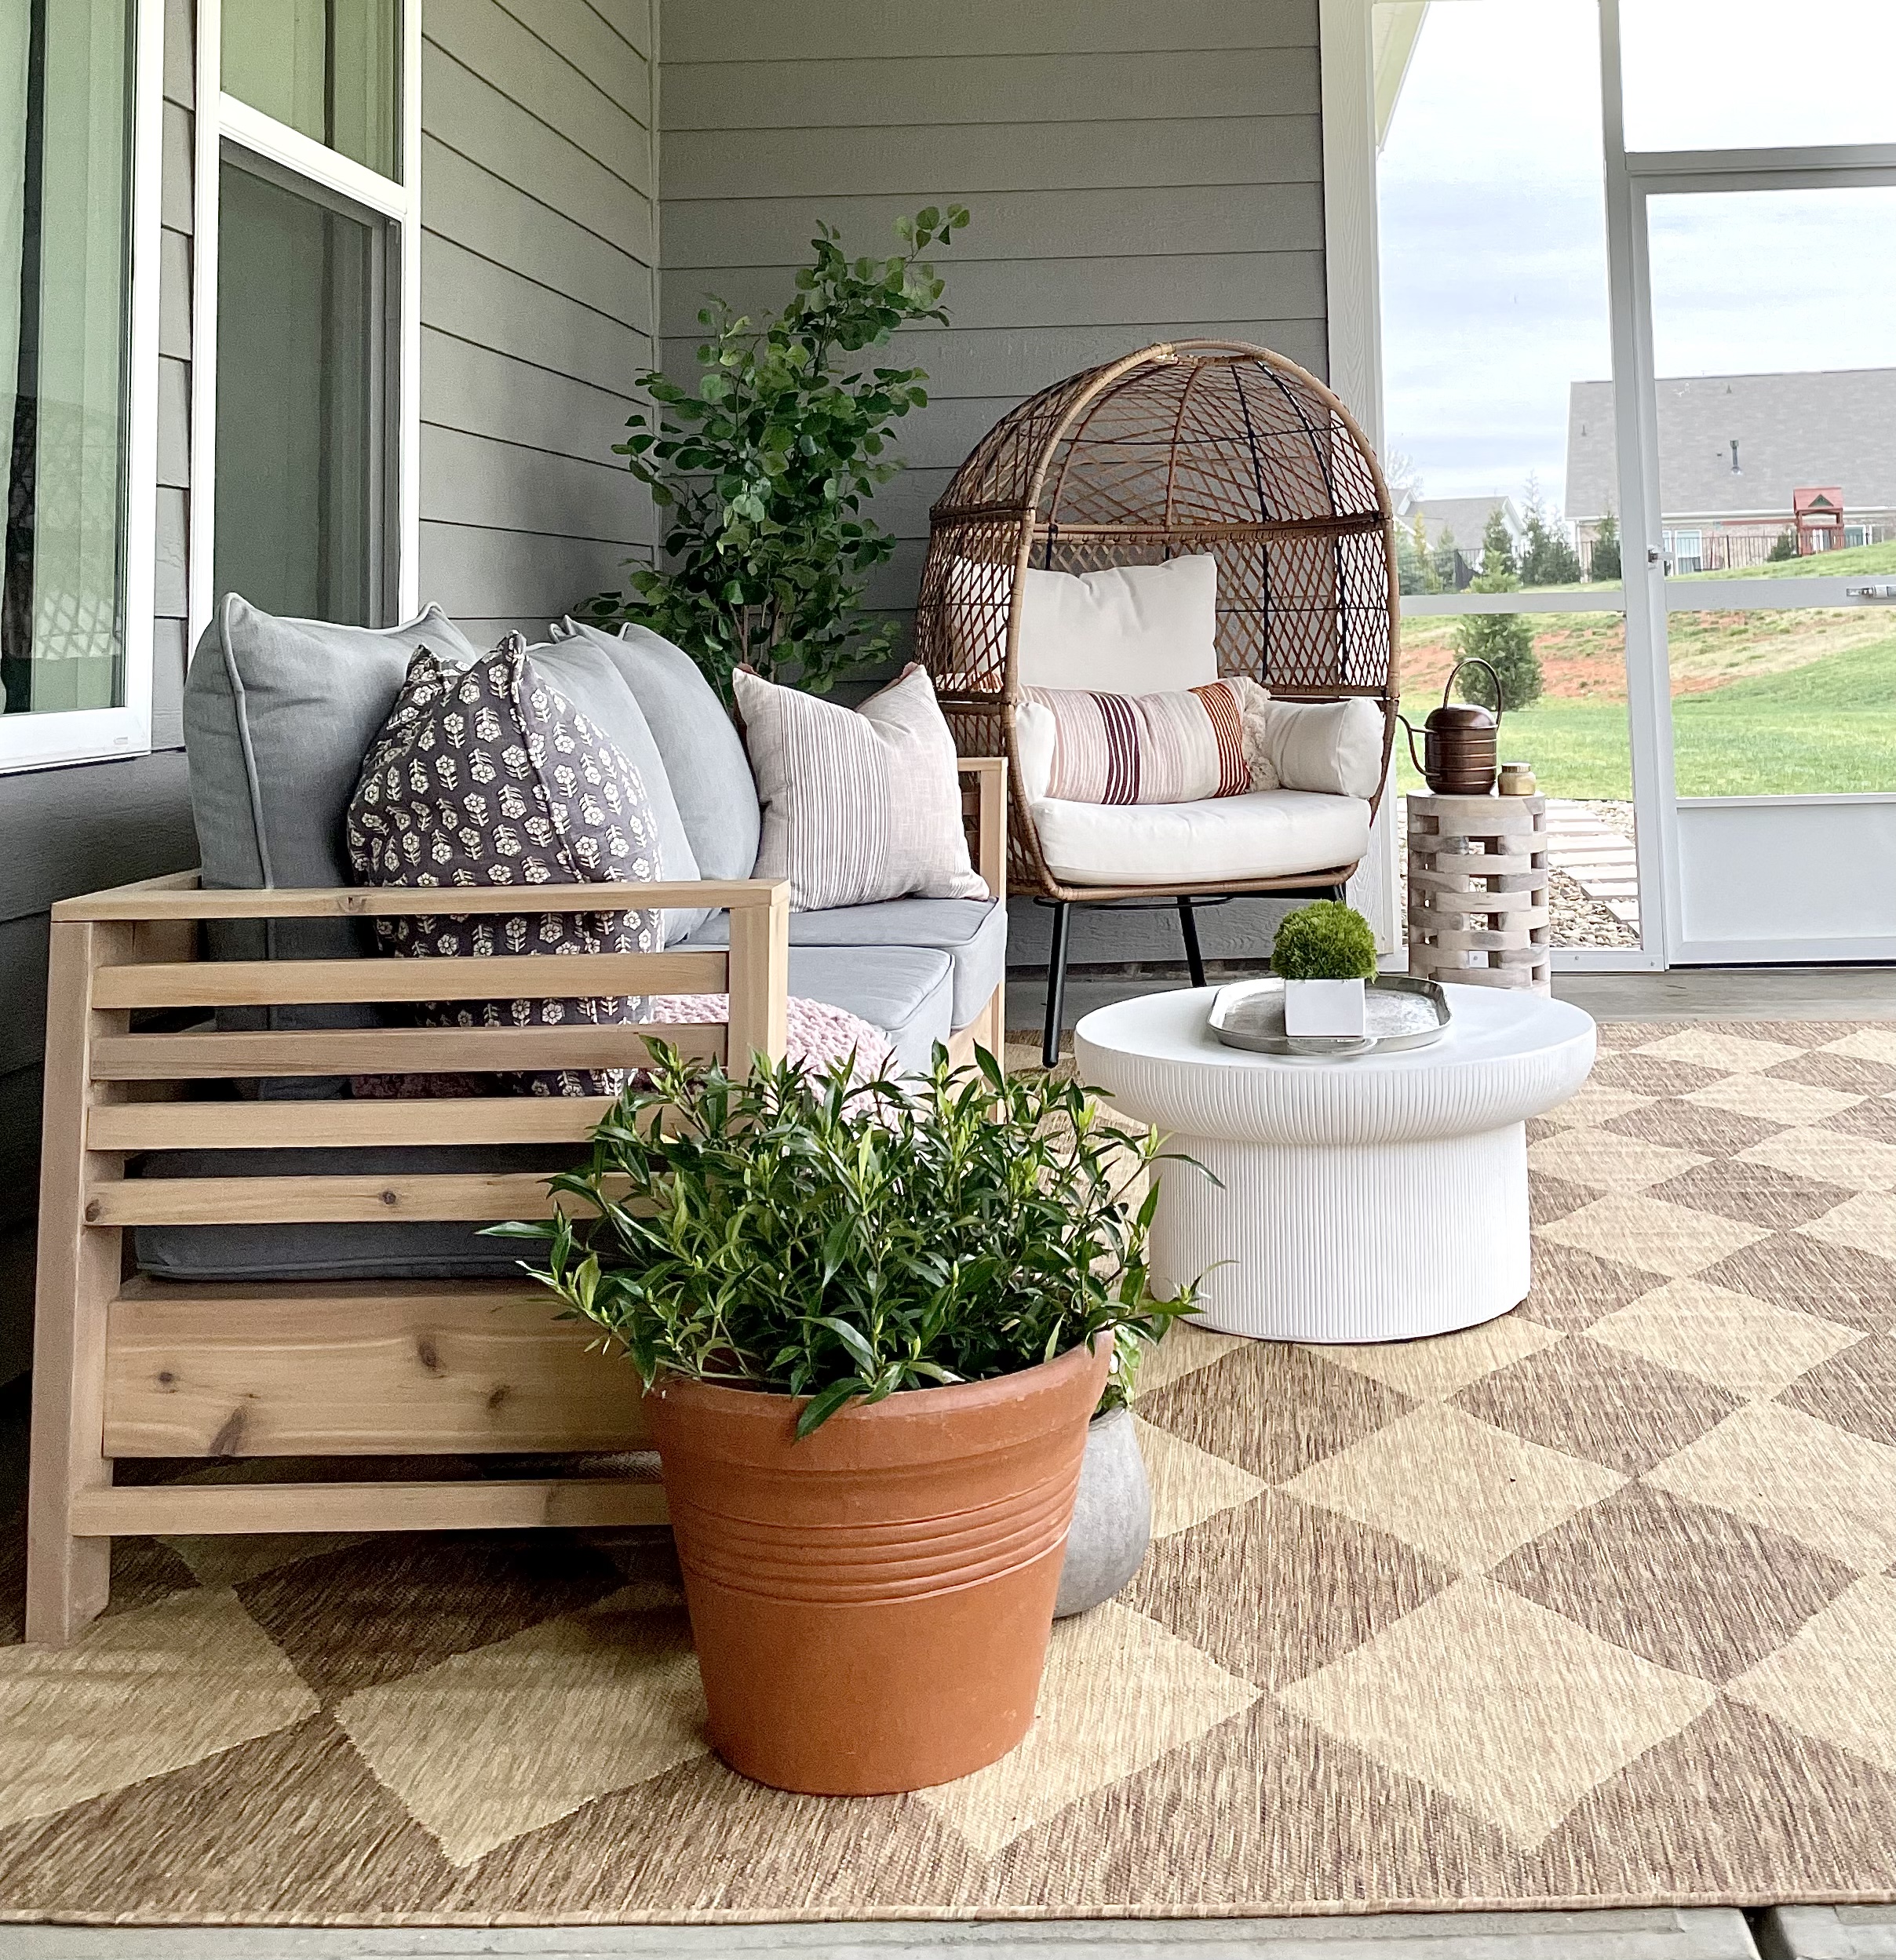
DIY Outdoor Sofa: My Secret for a High End Look
While the current price of wood doesn’t make this DIY Outdoor Sofa “cheap”, it does help you achieve a high end look for a fraction of the cost of buying.
But lets face it, no one wants their DIY projects to actually look “DIY”. So, my tip for making this sofa look high end:
Use Varying Sizes. While I did use a lot of 2x4s, I varied the sizes of my wood in some spots to bring more depth and variety. I think the different lumber sizes, inspired by this West Elm Sofa, helped elevate the overall look of it tremendously.
NOTE: I wanted this sofa to fit affordable and readily available outdoor cushions. If you want something deeper, adjust the cut depth and these world market cushions would work great.
Supplies
- (7) 2x4x8 (Optional: 2 more 2×4’s for extra support on the base)*
- (3) 5/4x6x8 (I will refer to this as a 1×6 for ease, but know that it is thicker than a standard 1×6) or 2x6x8*
- (1) 1x4x8
- (4) 1x2x8
- Sandpaper
- 2 inch kreg jig screws
- 2.5 inch stainless steel deck screws or kreg jig screws
- 2 inch nails
- Exterior Wood glue
- Wood filler
- Stain
- Cushions
Tools
- Drill
- Saw
- Kreg Jig
- Nail Gun
- Sander
Cut List
(2) 25″ 1x6s
(13) 25″ 2x4s
(2) 28″ 1x4s
(2) 75″ 1x6s
(2) 75″ 2x4s
(10) 25″ 1x2s
*Note: I bought all my lumber at Lowes. I chose to use Cedar. The 2x4s and 1x6s are a smoother cut and were only available at a couple of stores in my greater metropolitan area.
Lets Build this DIY Outdoor Sofa
The measurements in this tutorial are specific to the cushions I purchased, which you can find here. If you use different cushions, you will want to adjust the measurements.
Before starting with the build, I sanded all my pieces of wood with 150 grit sandpaper. The 2x4s and 1x6s were pretty smooth but the others had a really rough side. A good sanding with an orbital sander smoothed them out well.
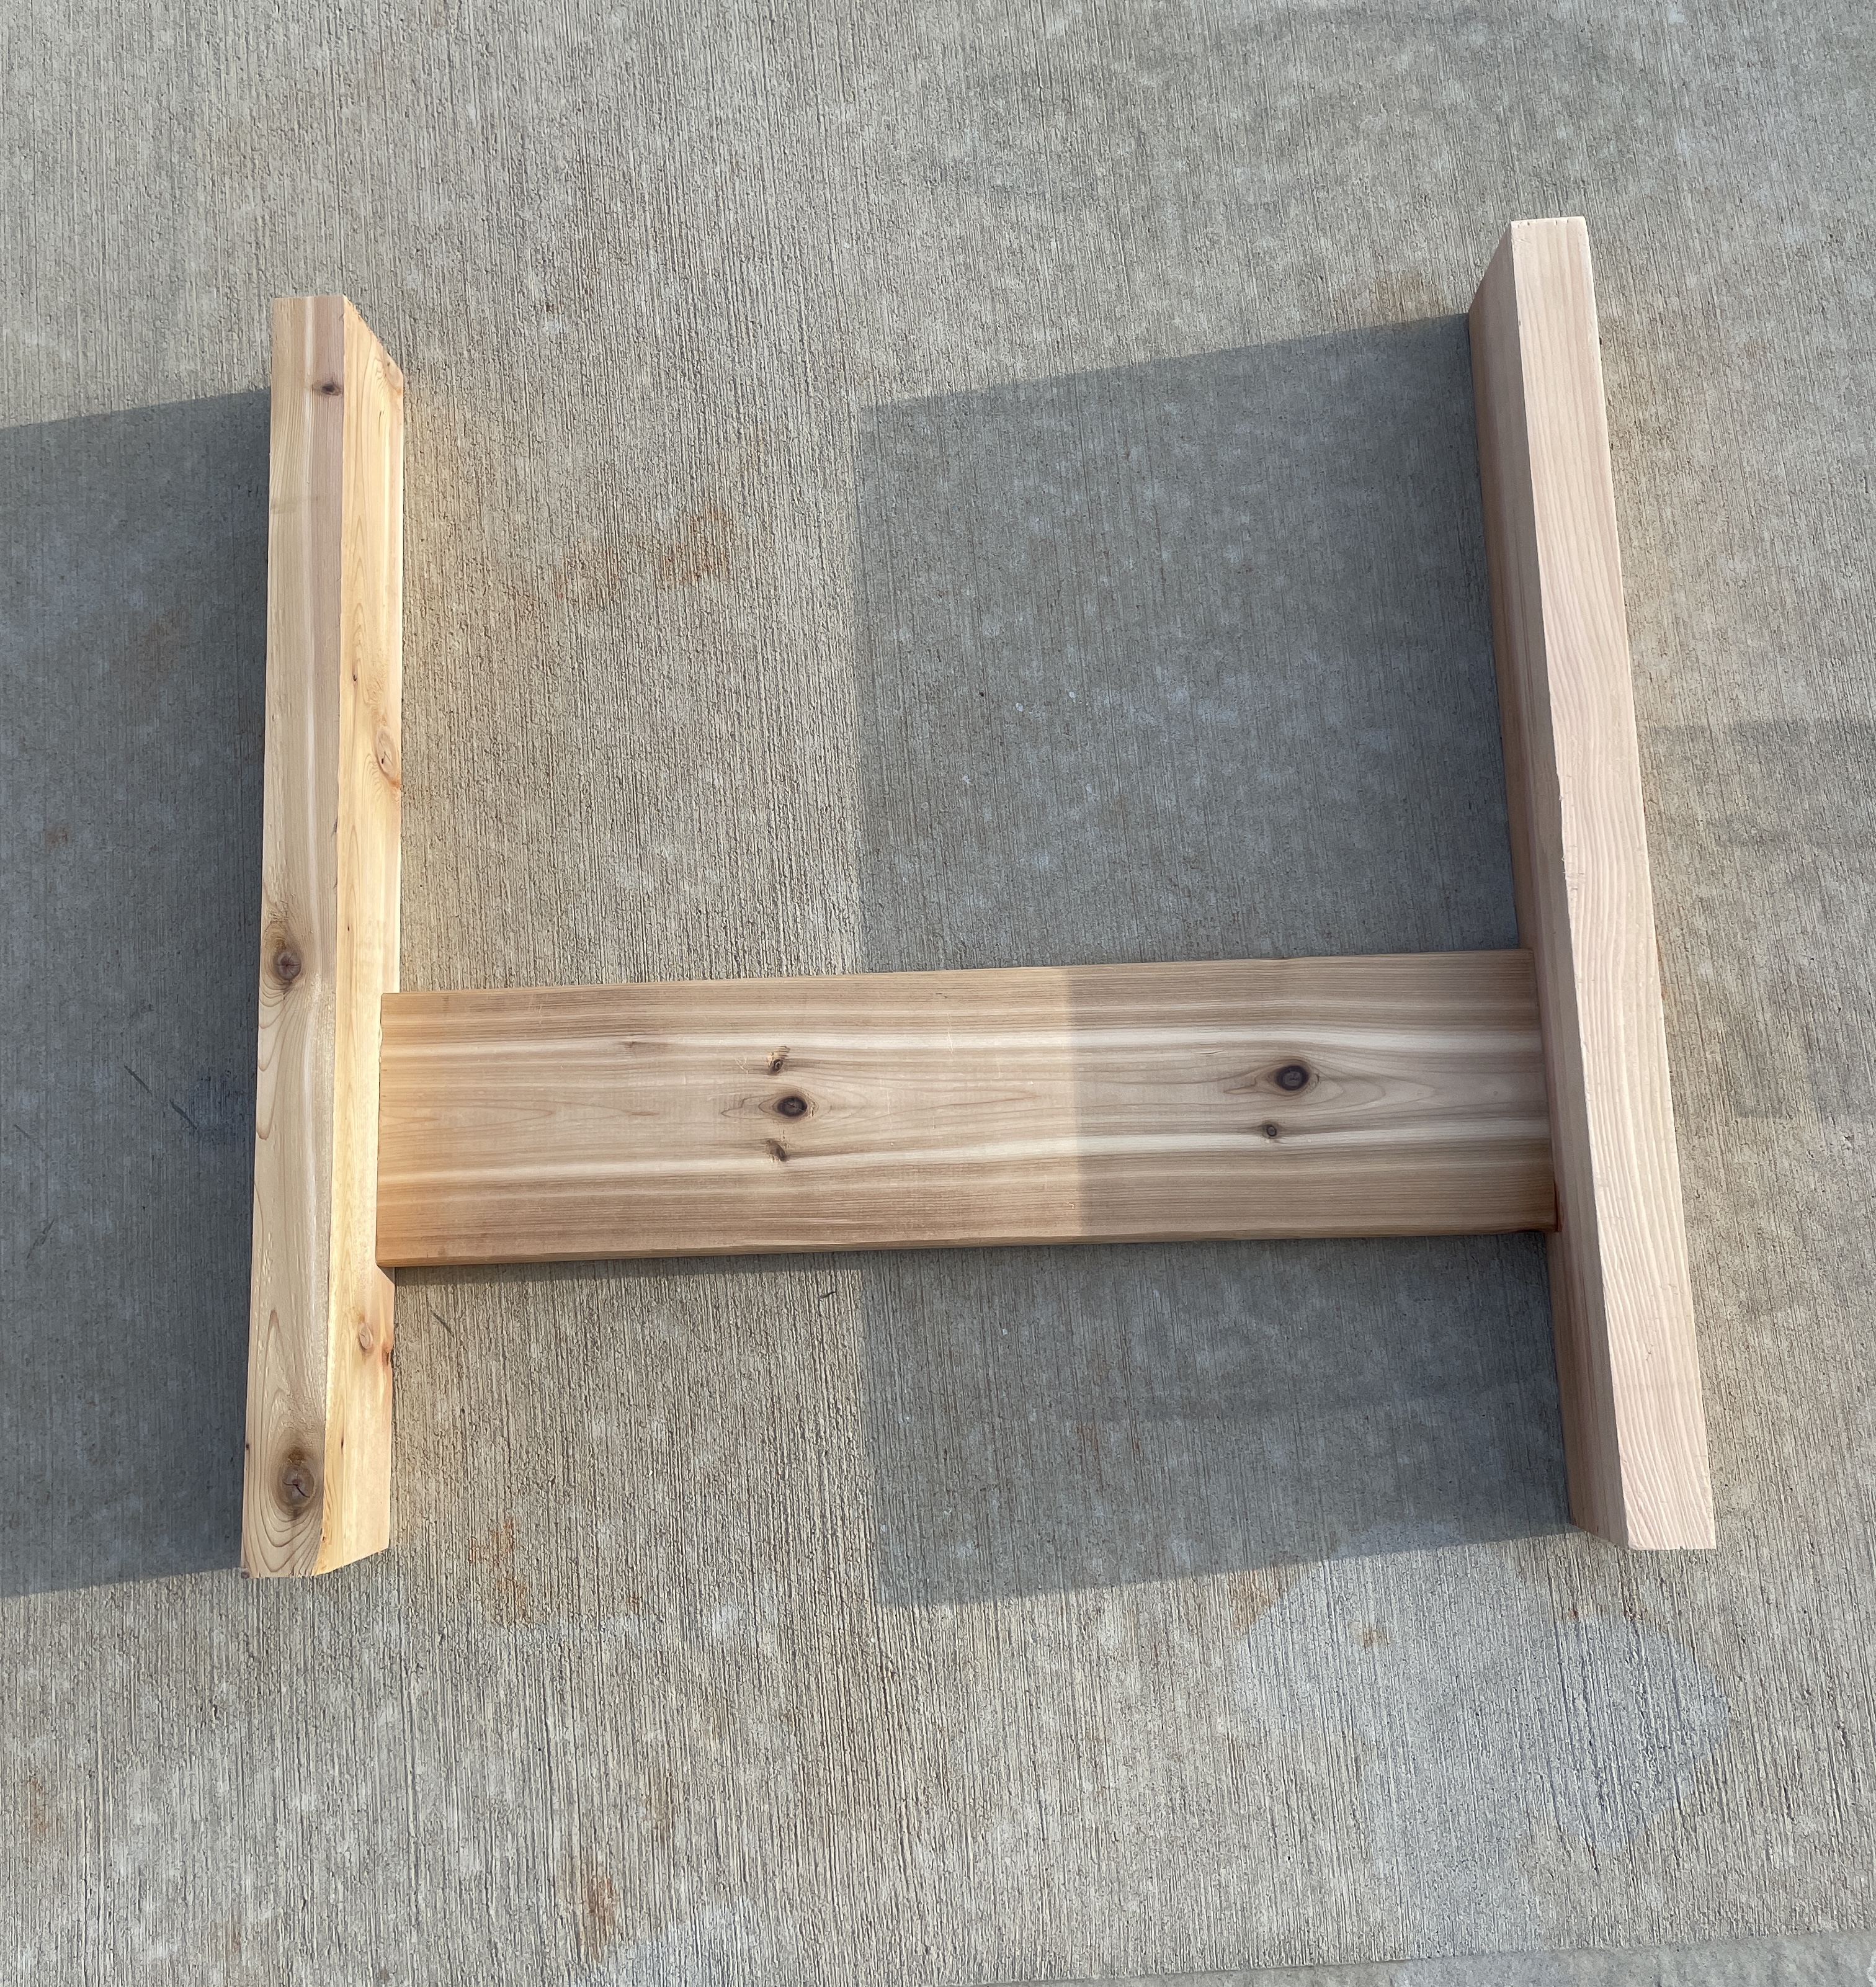
Building the DIY Outdoor Sofa Sides
First, I started with building the sides. Cut your wood to the correct size.
Cut:
- (2) 25″ 1x6s
- (4) 25″ 2x4s
- (2) 28″ 1x4s
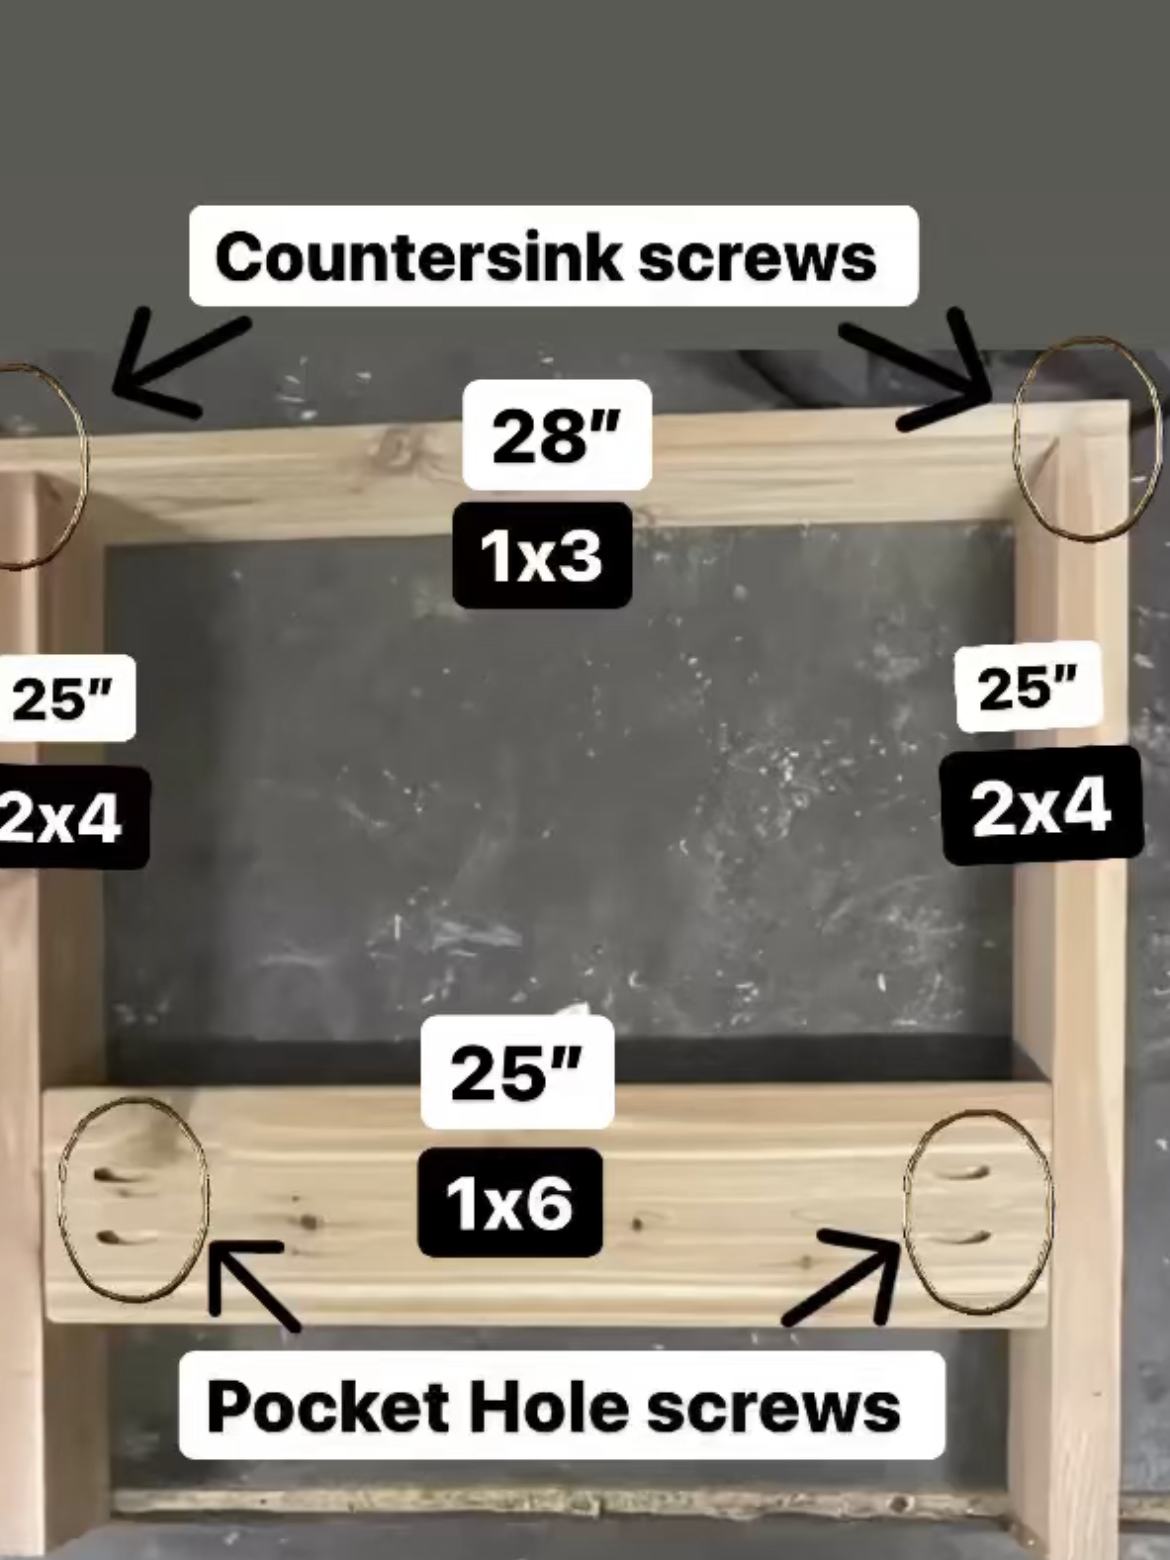
Now, drill 2 pocket holes on each side of the 1x6s. Measure 11 inches up on the 2x4s. Attach the 1×6 with the top at the 11 inch mark. Attach using wood glue and 2 inch pocket hole screws.
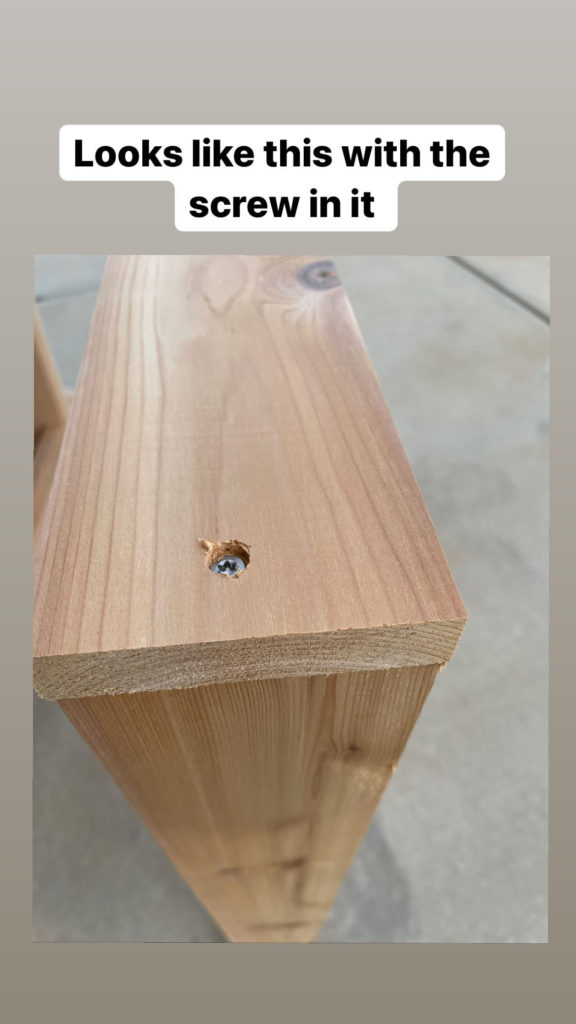
Next, Add the 1×4 to the top using 2 inch screws. You want to countersink the screw, so predrill a large, shallow hole in the top of each 1×4 (I just used the kreg jig bit) so the screw can sit down below the surface of the wood. Later, you will fill this with wood filler and cover up the screw.
Repeat these steps for the second side.
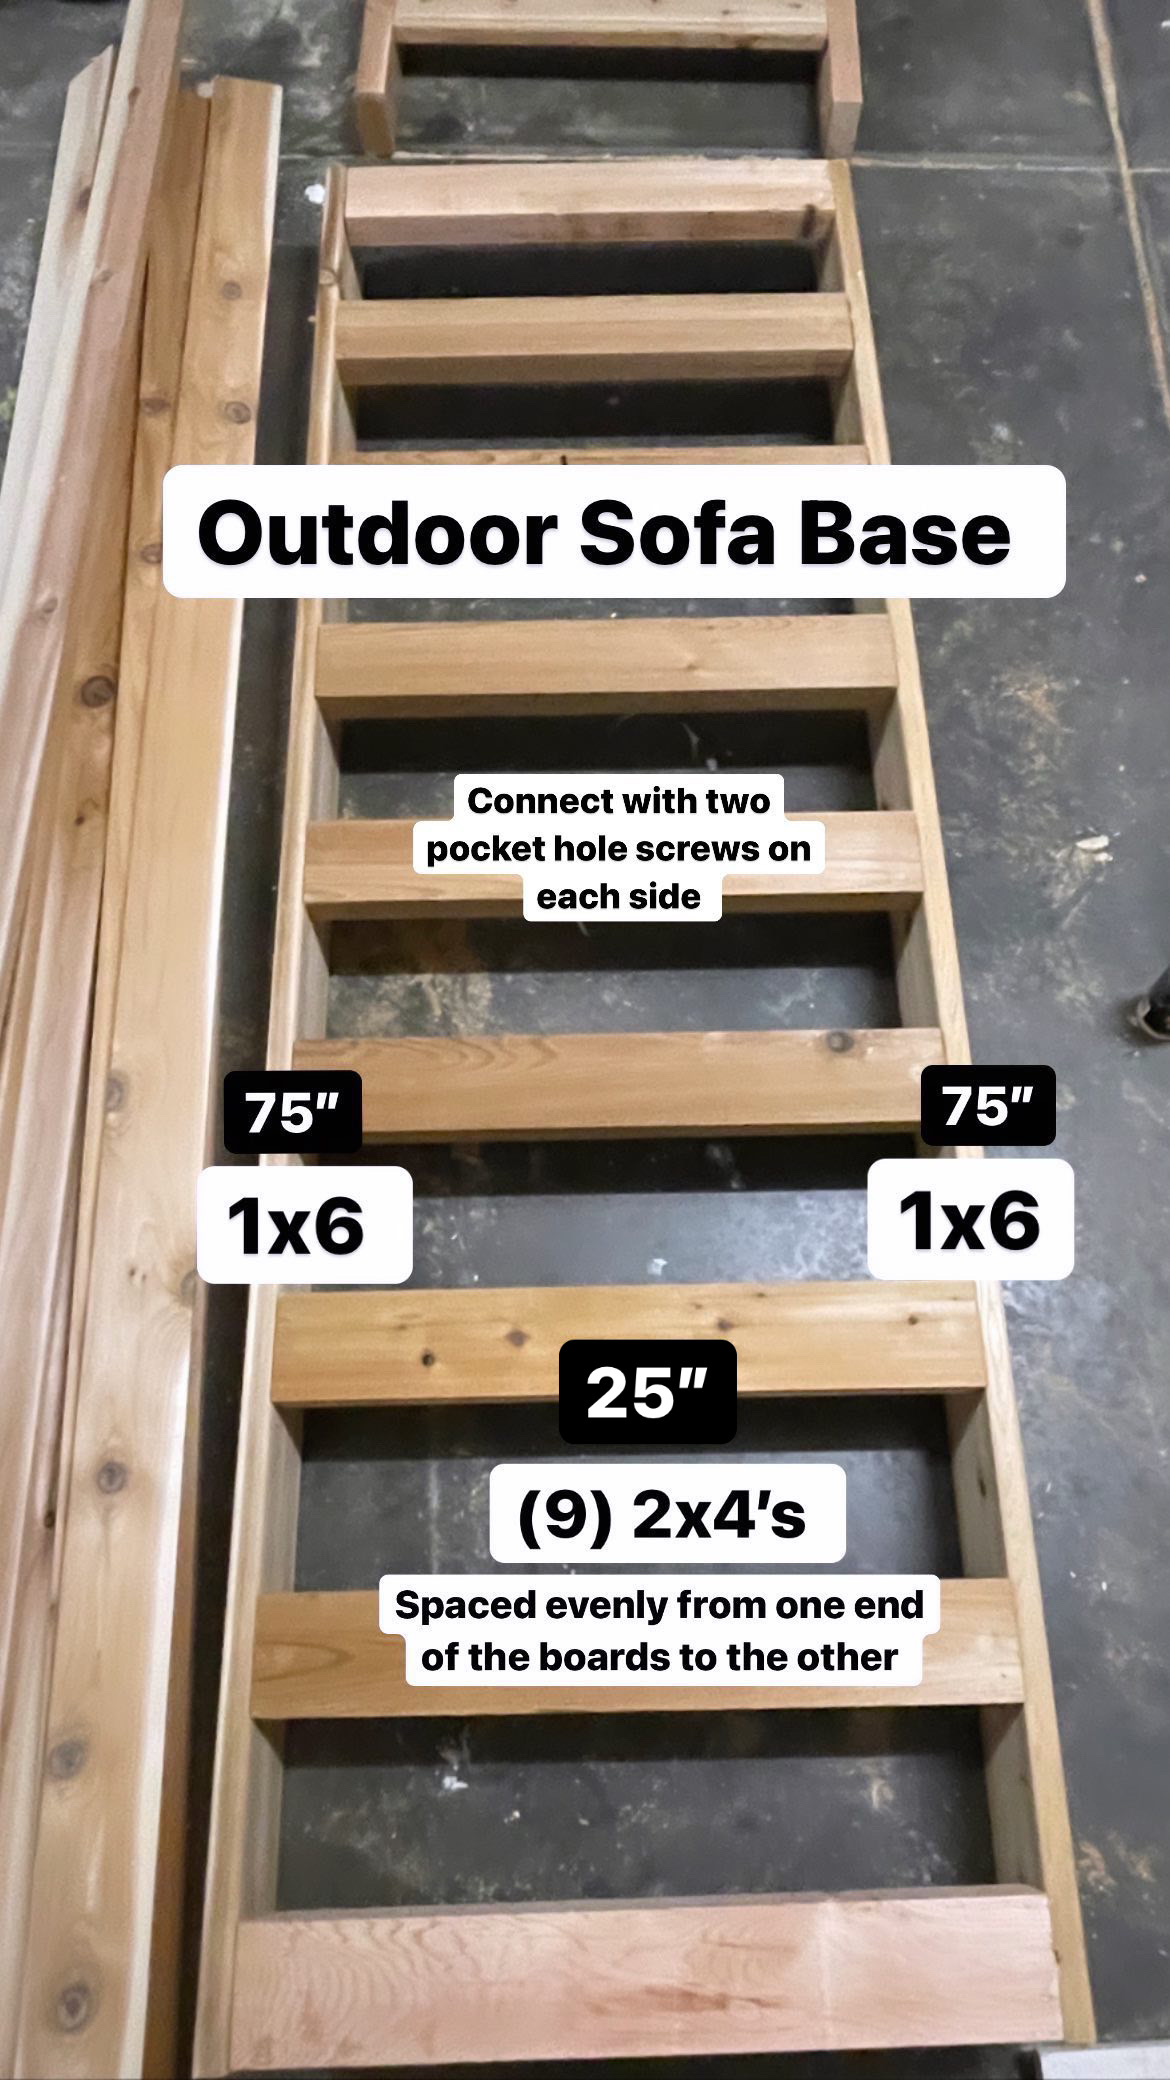
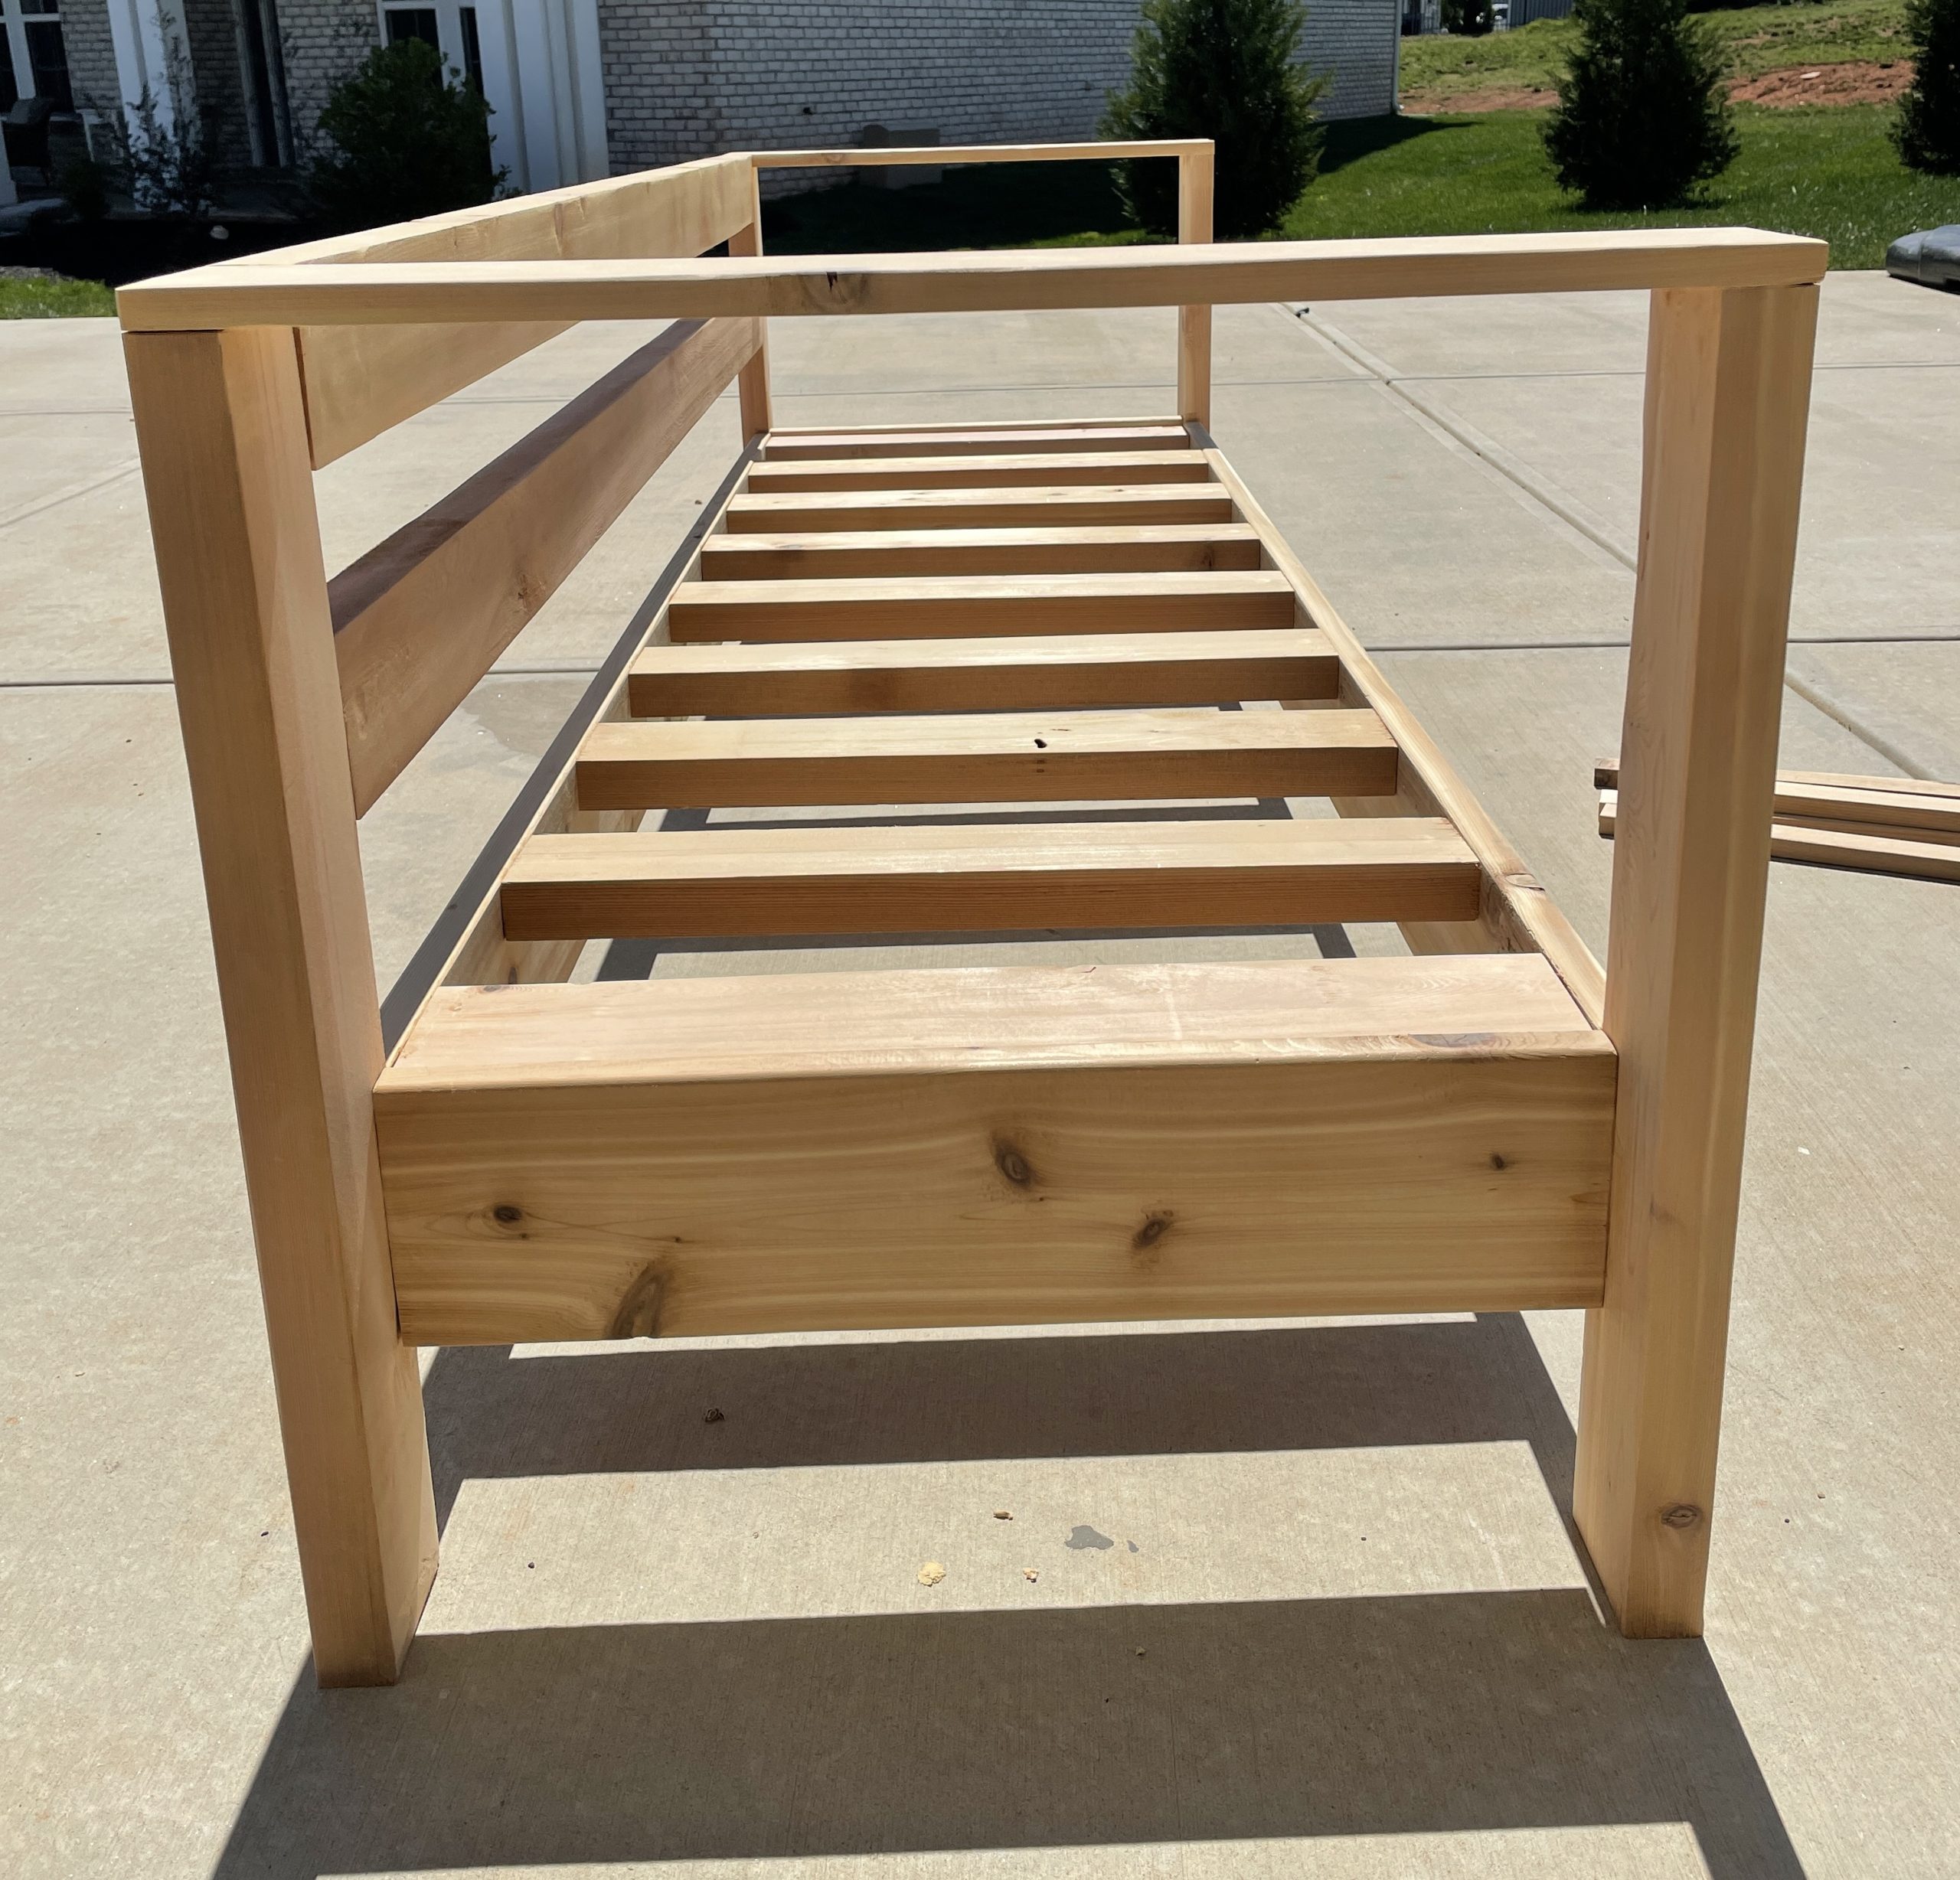
DIY Outdoor Sofa Base
Lets get started on the base.
- Cut (2) 75″ 1x6s
- Cut (9) 25″ 2x4s
Drill 2 pocket holes on each side of the 1x6s. These will be used later to attach the base to the legs.
Drill 2 pocket holes on each side of the 2x4s.
Next, attach the 2x4s to the first 1×6 with 2inch kreg jig screws and wood glue. I started with one in the middle and then worked my way out. Make sure the tops of your 2x4s are sitting even, or a little lower than the top of the 1×6. I placed mine a little lower. End with a 2×4 at each end of the 1×6.
Repeat this connecting the other side of the 2x4s to the other 1×6.
OPTIONAL: I did decide to attach (2) 2x4s to each 1×6, just under the (9)2×4 slats. My kids are wild and this just added extra support. I used decking screws and screwed directly into the 1X6.
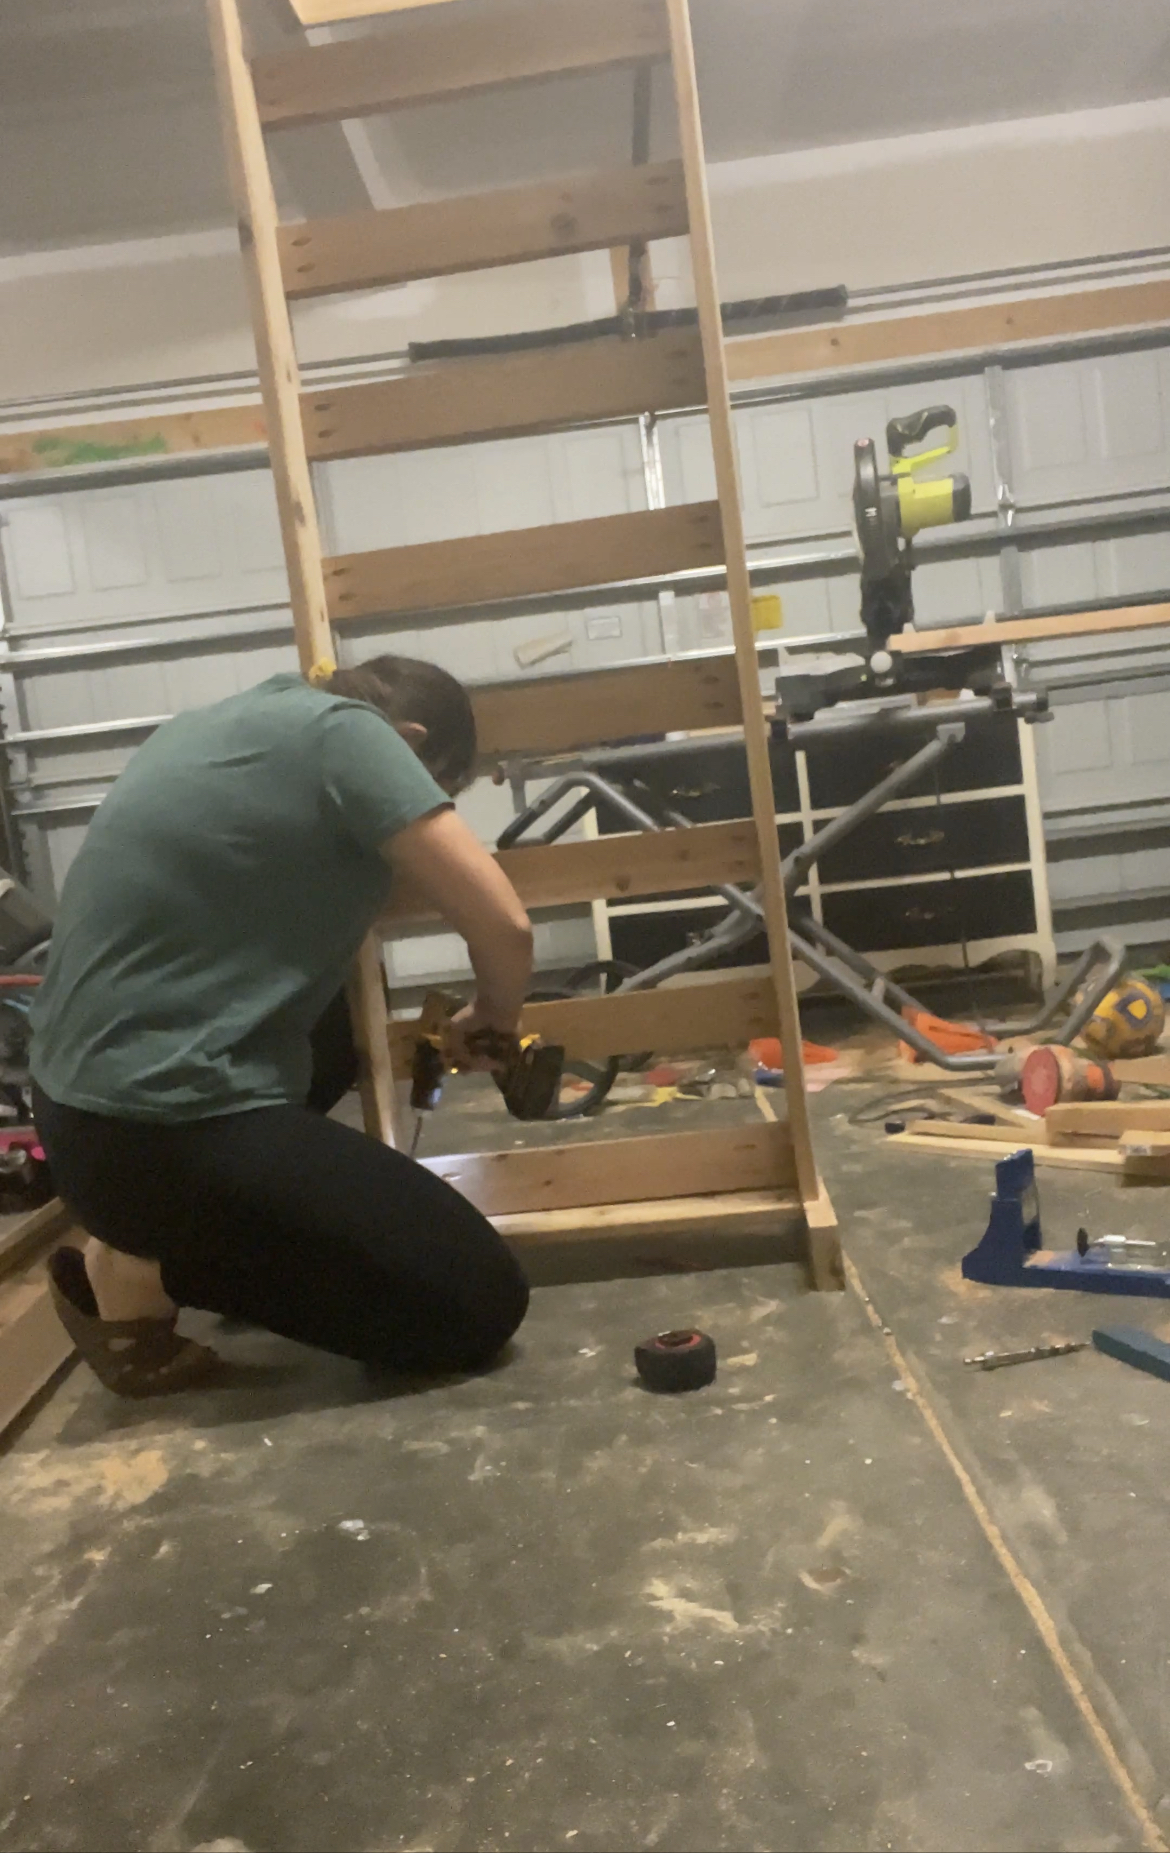
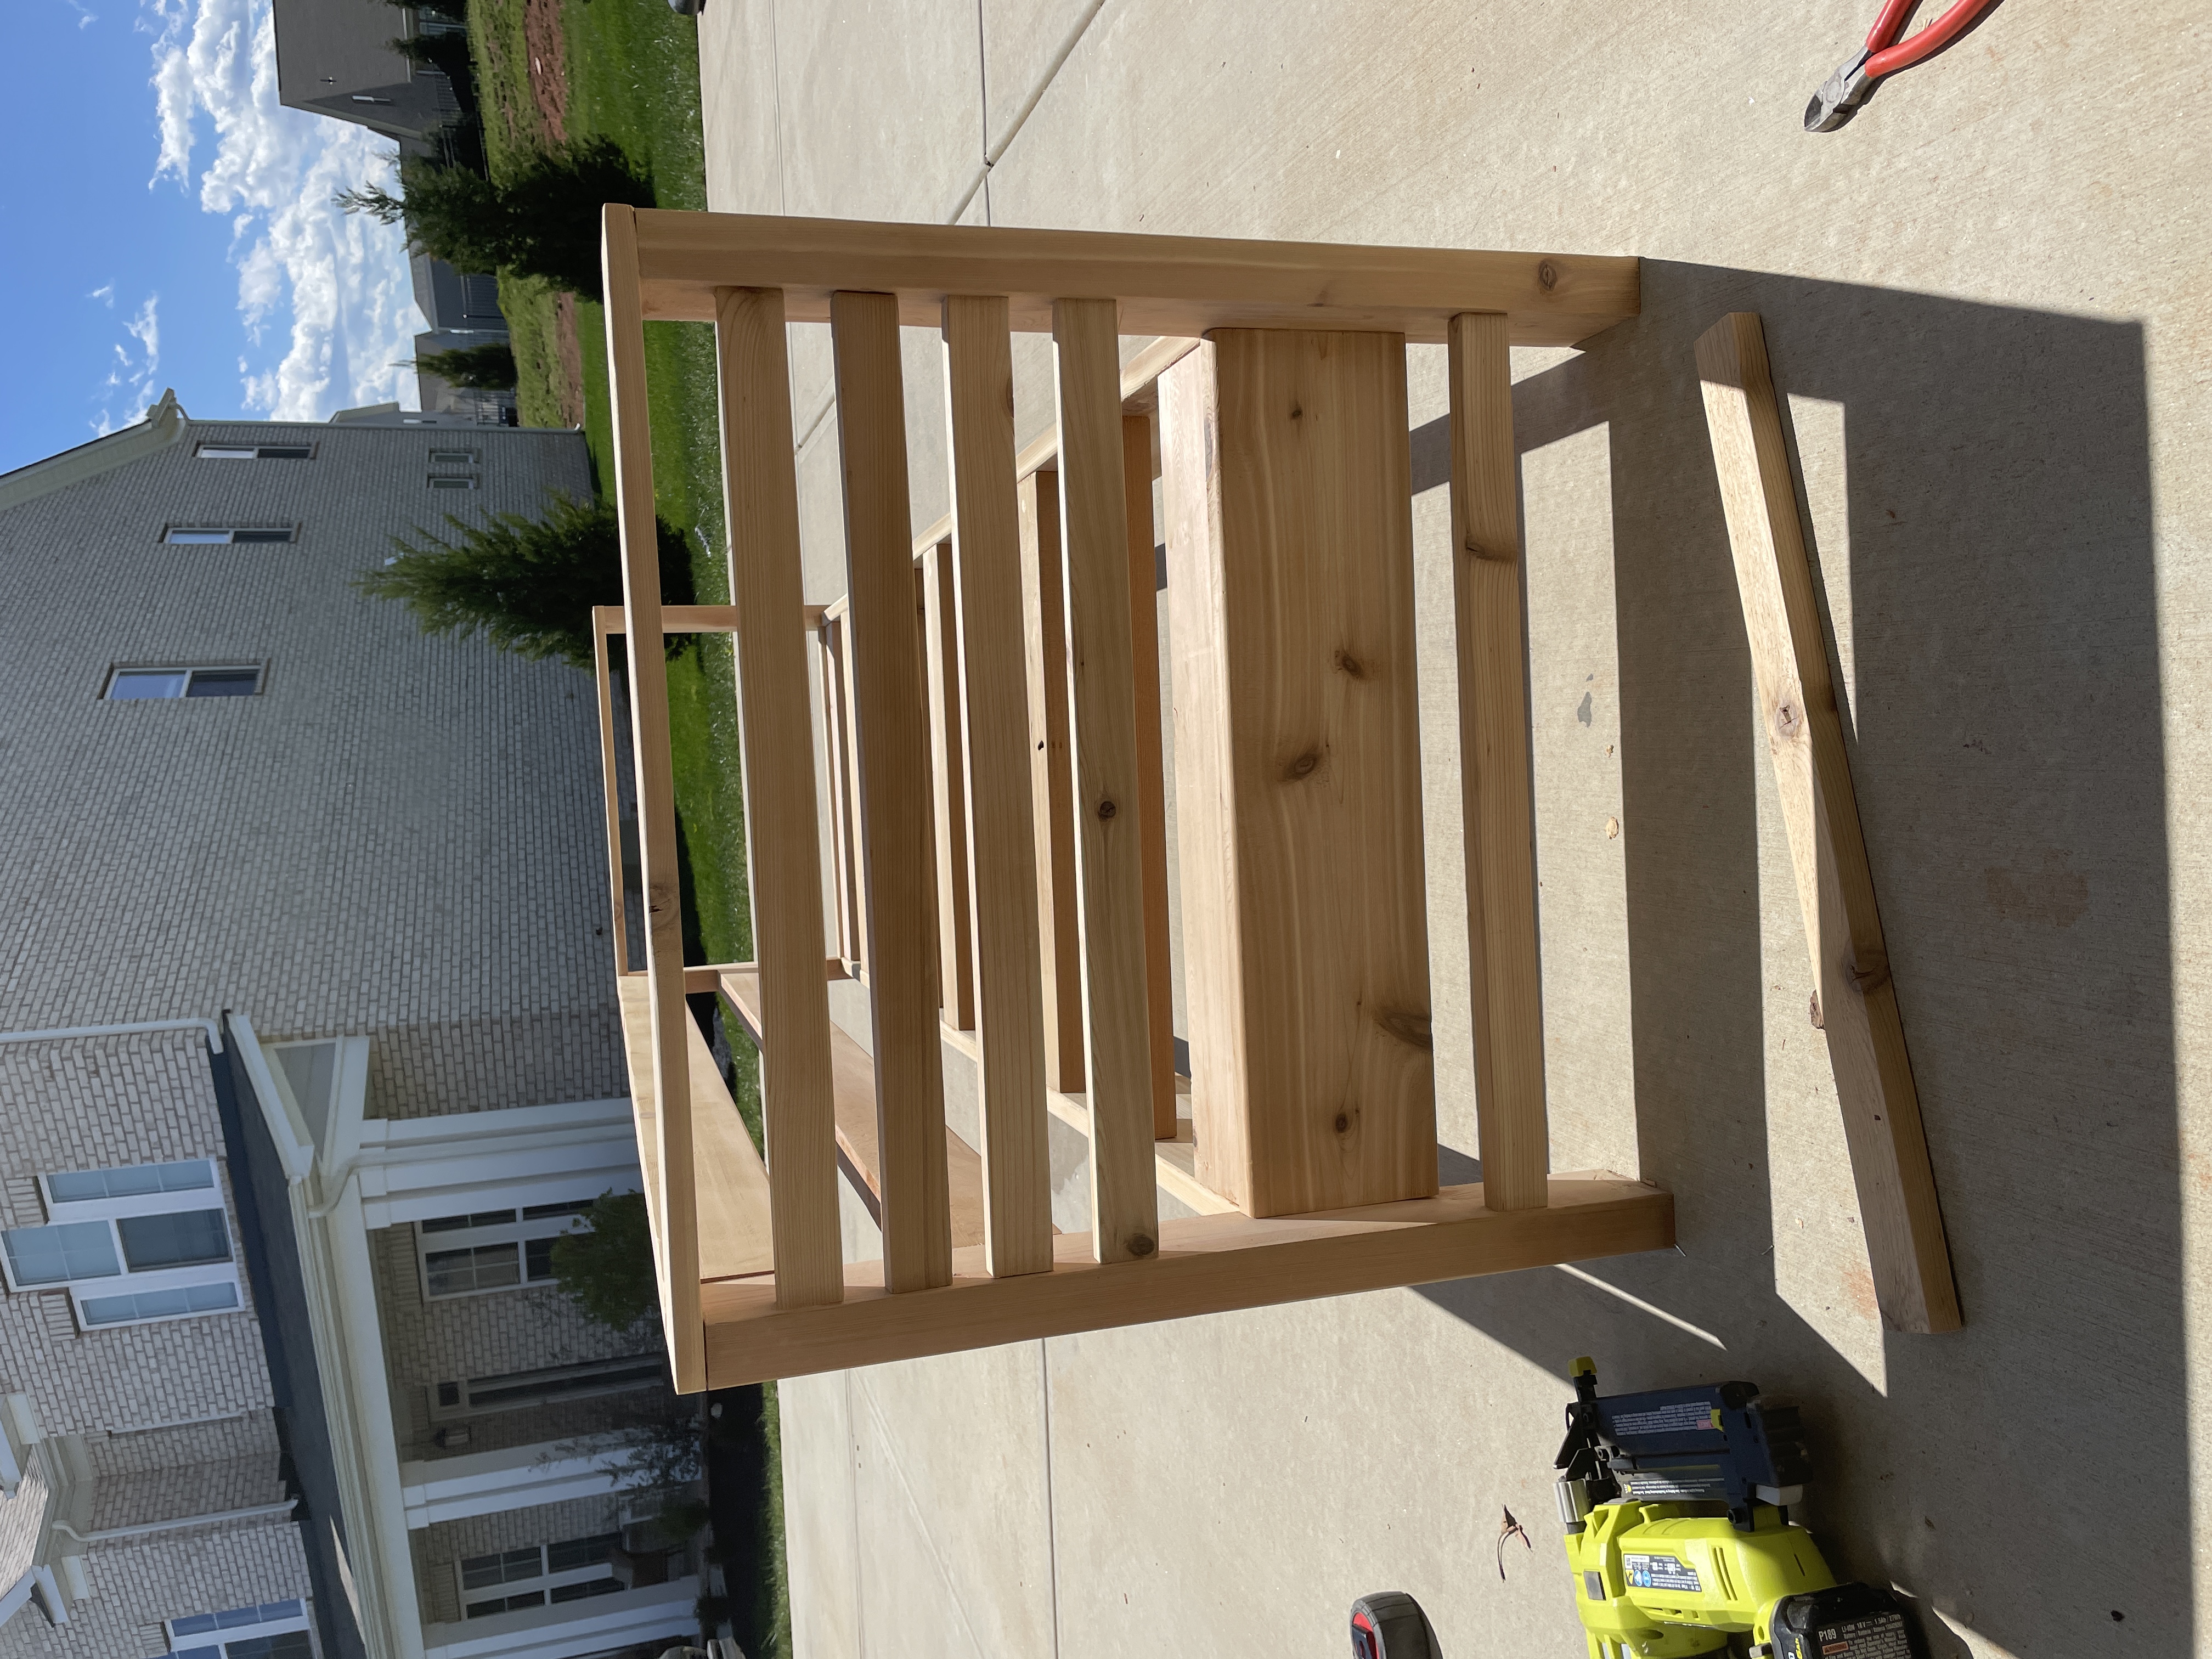
Attach the DIY Outdoor Sofa Base to the Sides
This is where those pocket holes in the 1x6s come into play. Lay one of the assembled sides down on the ground and hold the base up vertically on top of it. If you have someone to help hold, while you screw, that works best. Line the 1x6s of the base up with the 1x6s on the side…so 11 inches up the 2×4.
When you are done with one side, lay the next side down and repeat to connect.
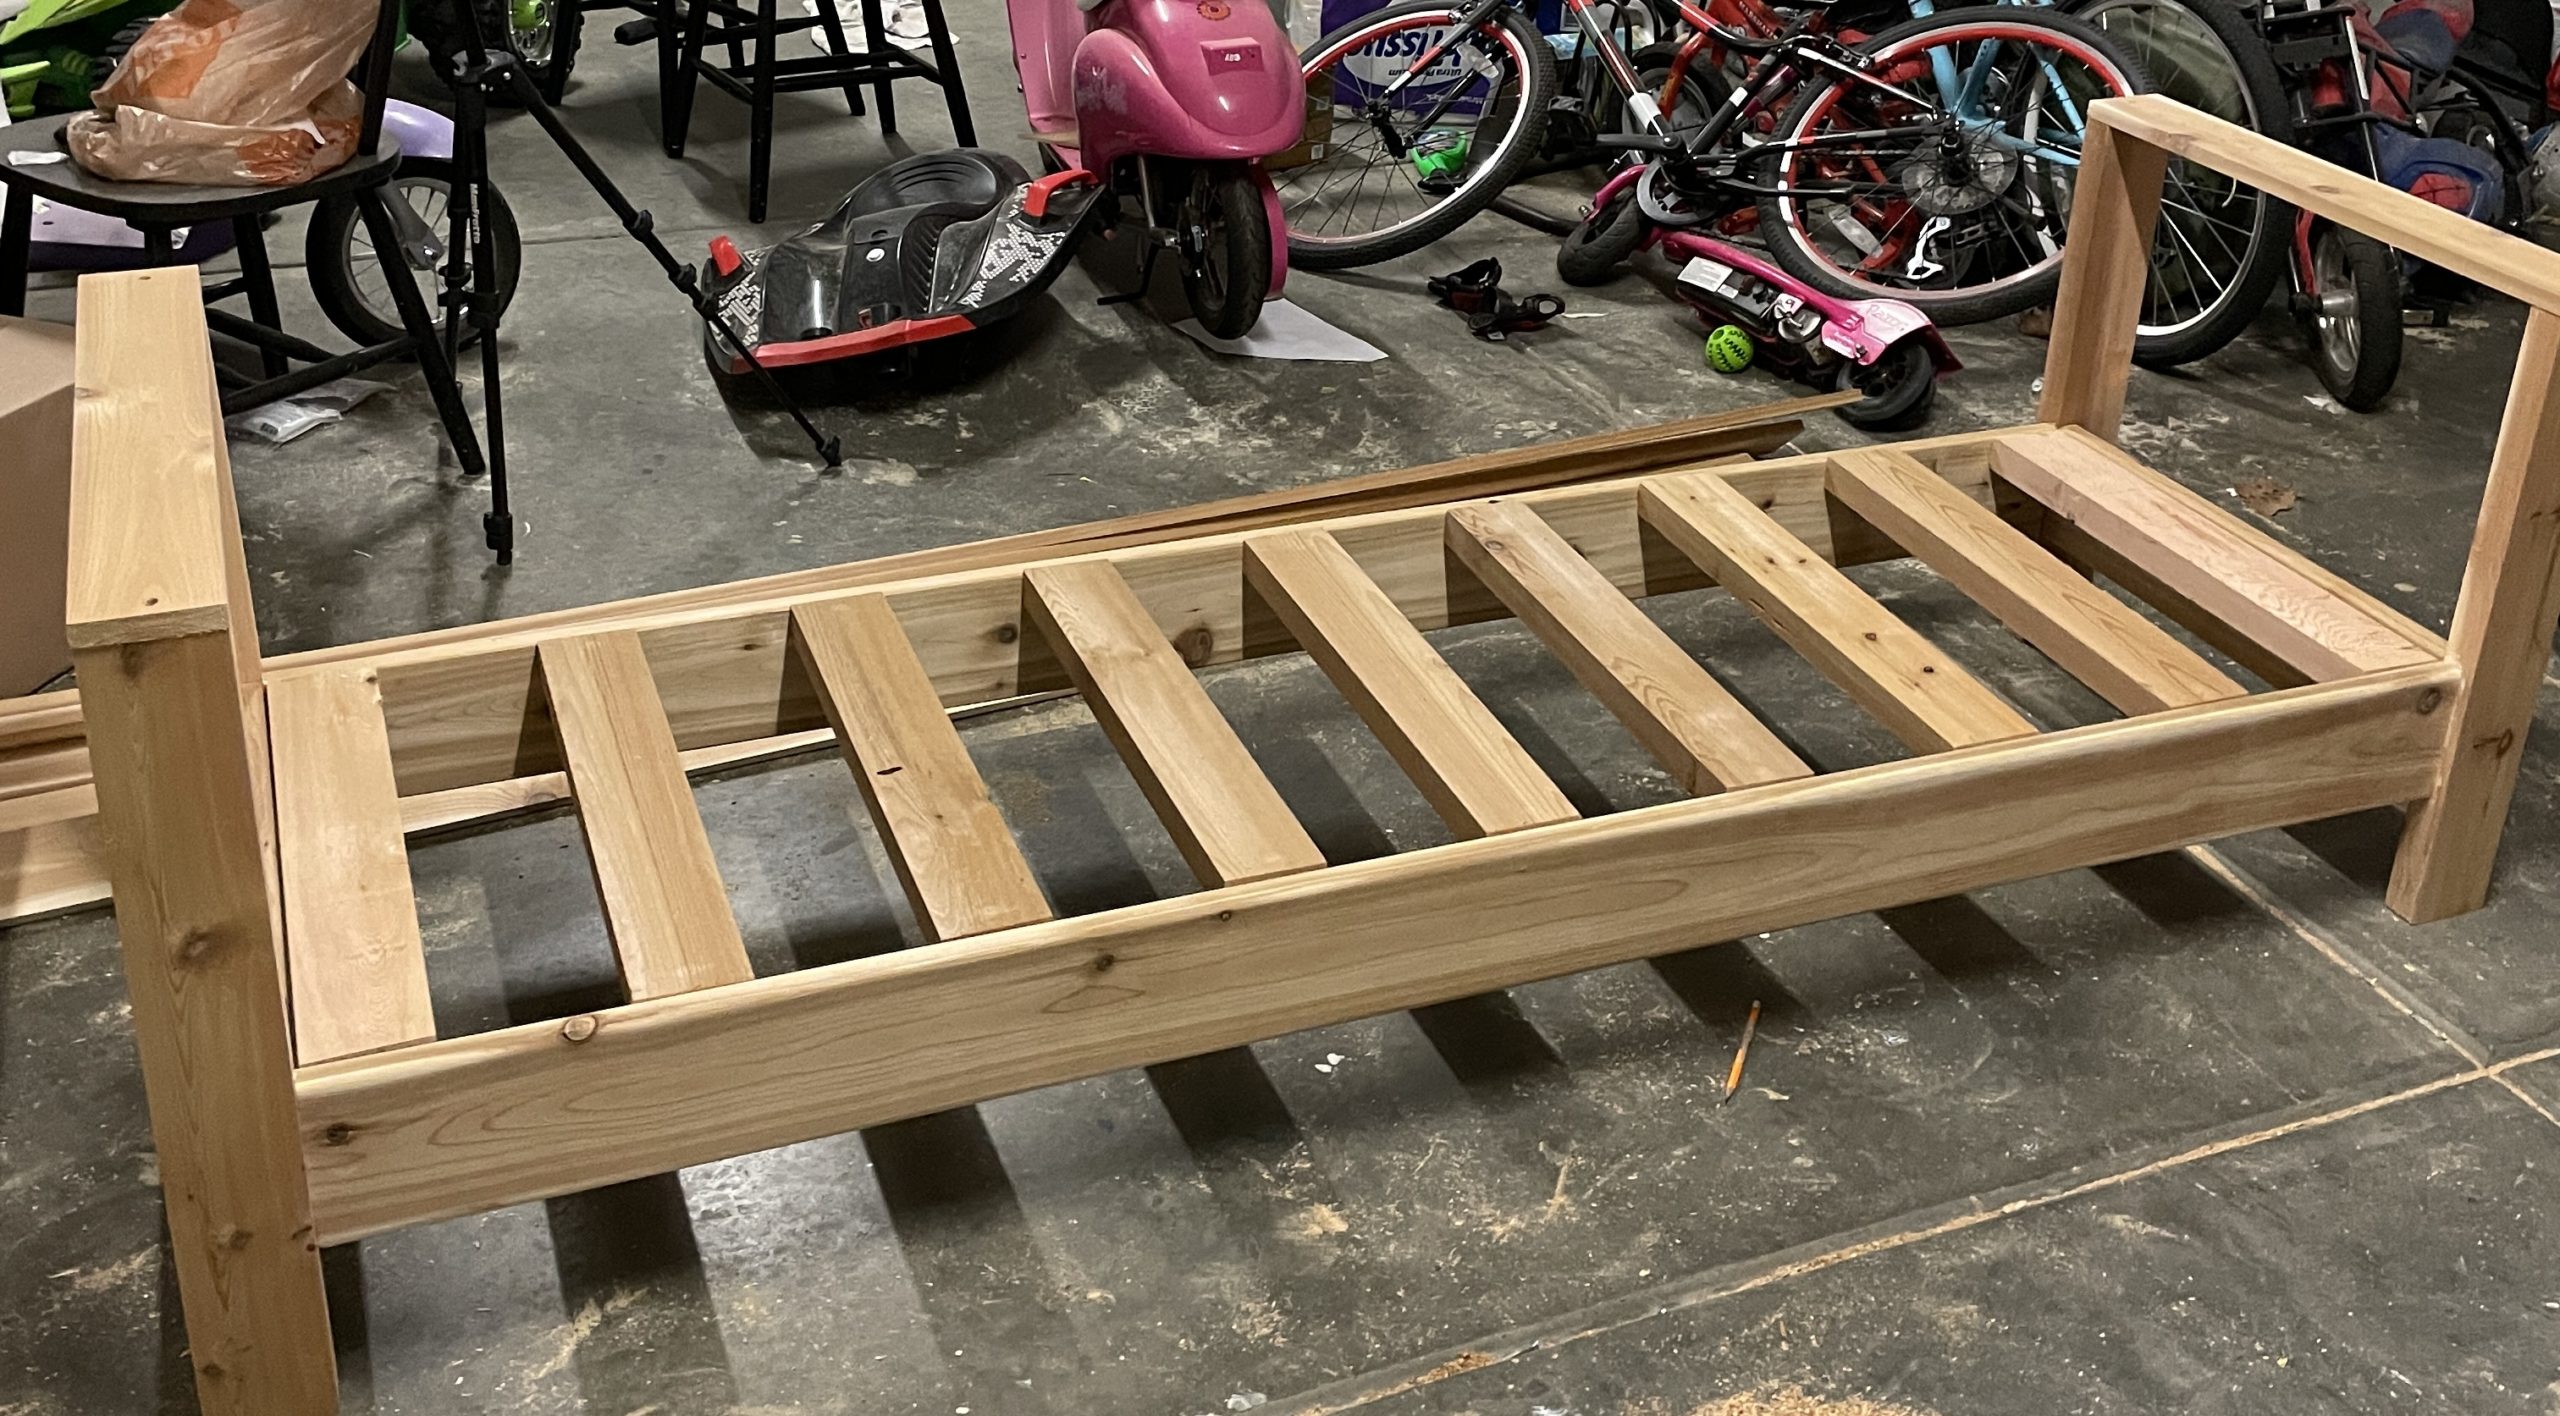
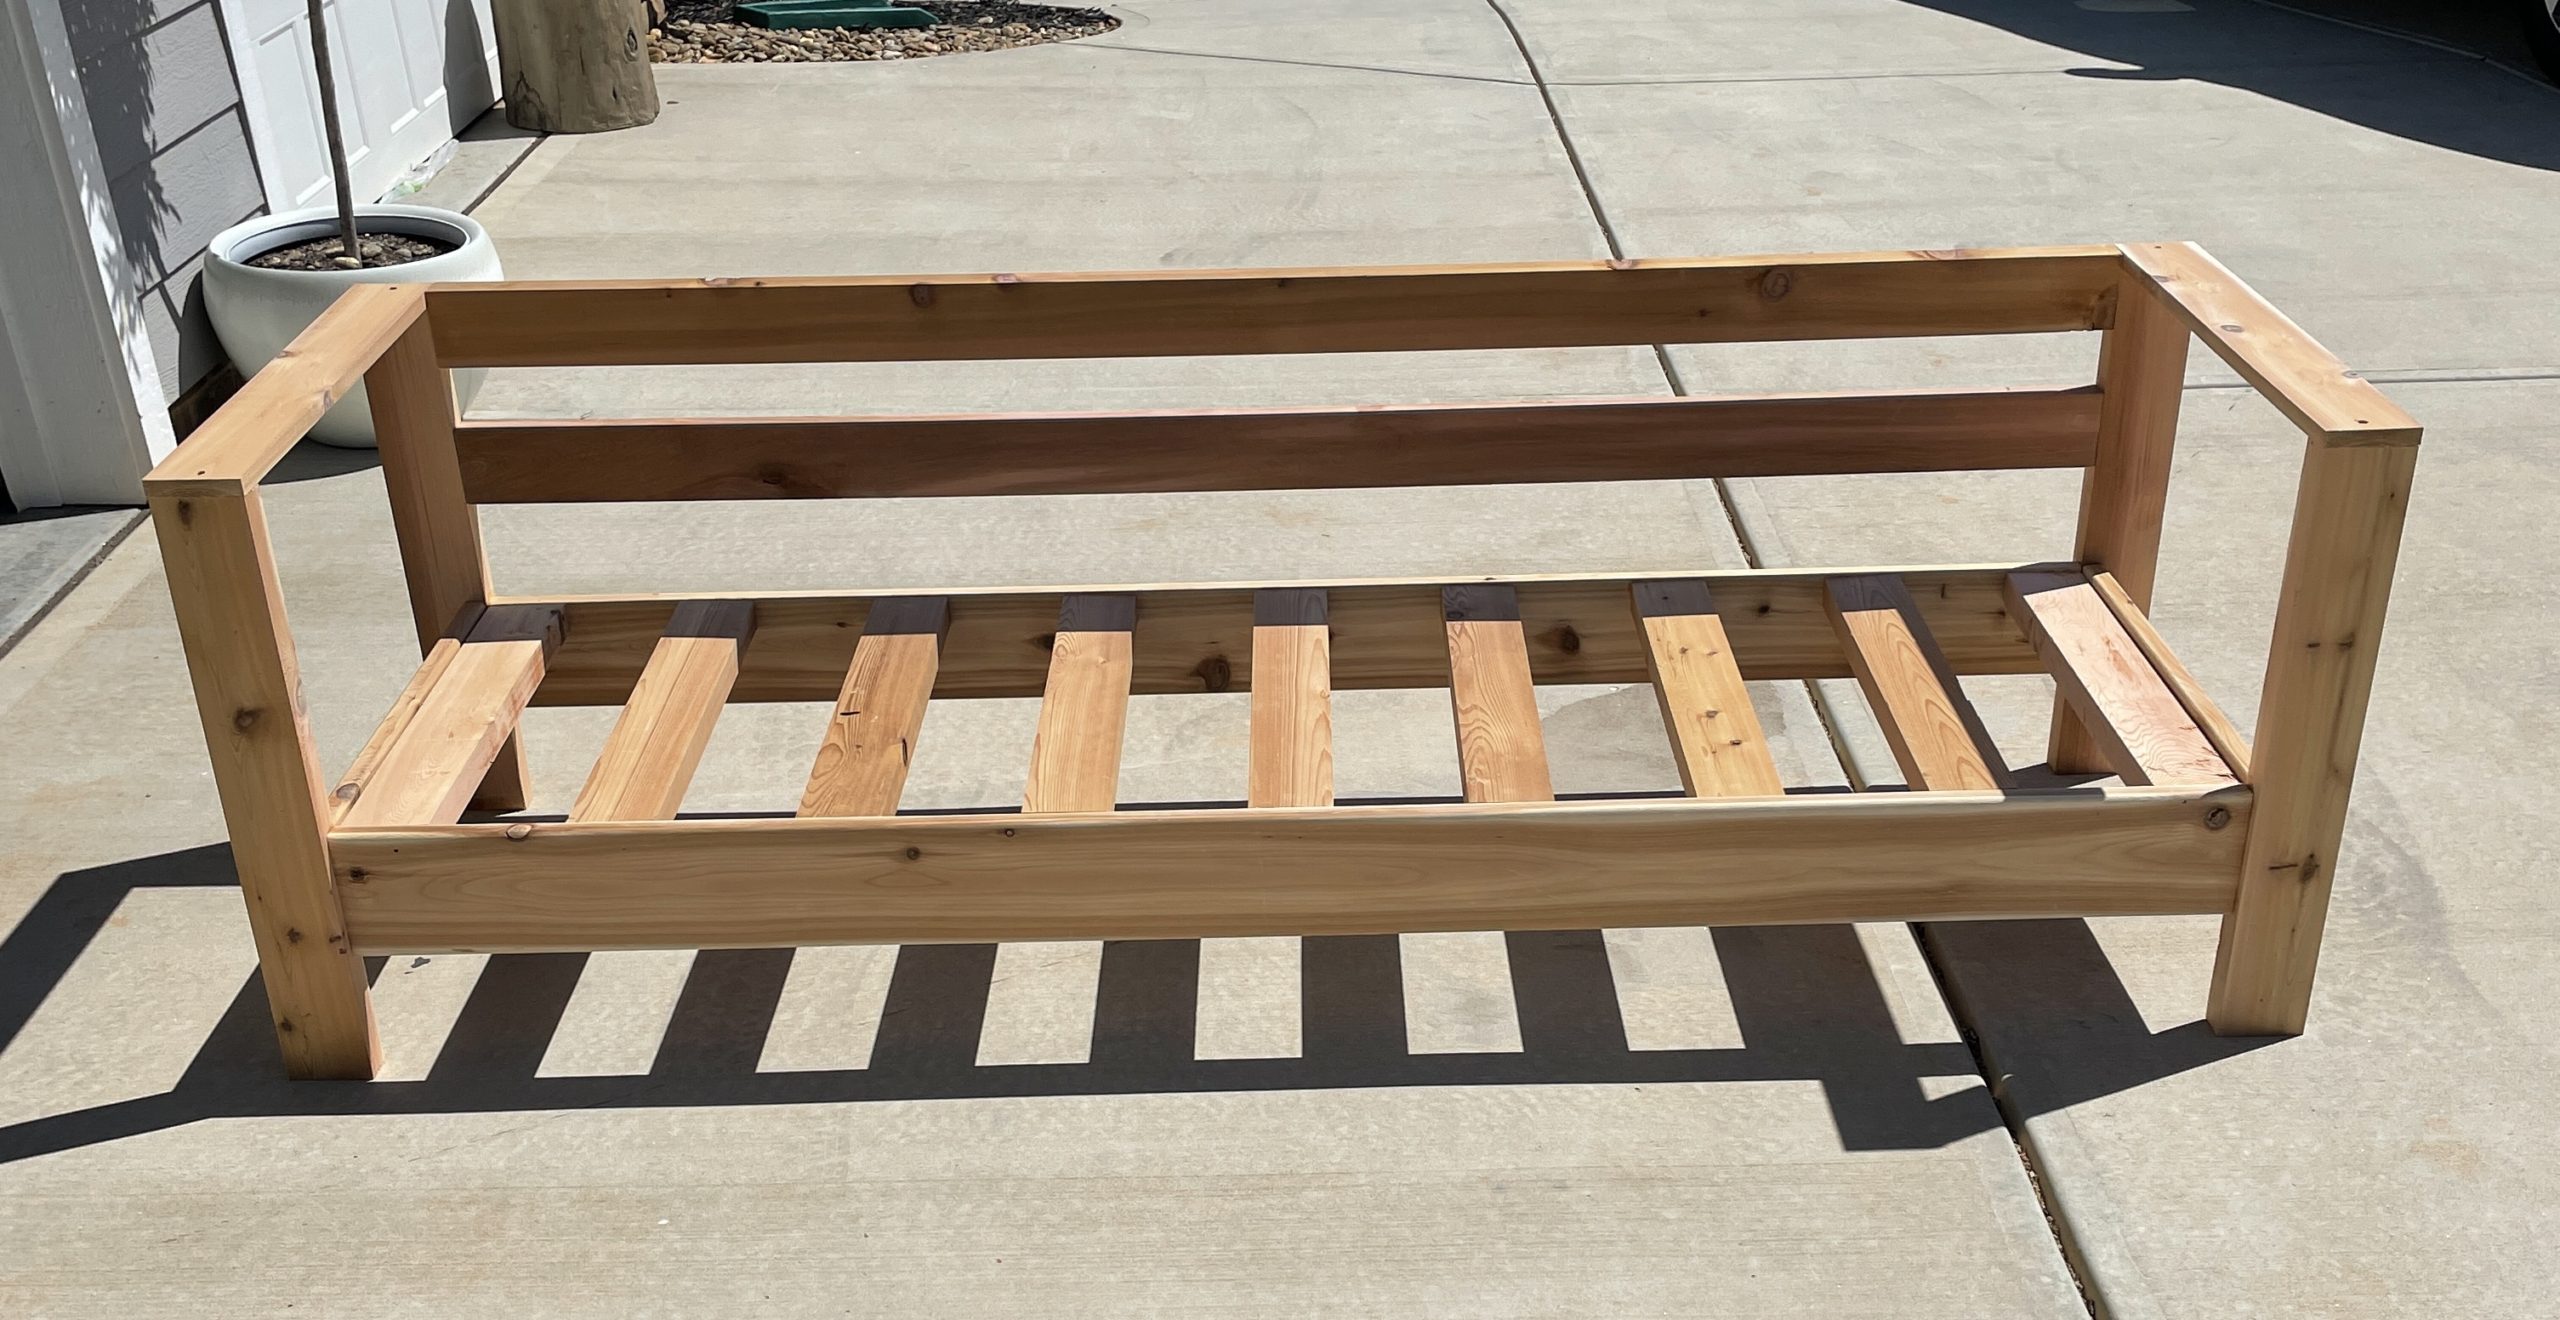
DIY Outdoor Sofa Back
I kept this part really simple.
- Cut (2) 75″ 2x4s
Drill pocket holes on each side. I did drill them a little off center to make sure they would screw in to the side arm (2×4) and not the top of the side (1×4). Attach using 2.5 inch pocket hole screws. I attached the top piece flush with the arms and the bottom piece 3 inches below the top piece.
Side Detail
This part is totally optional and I actually really liked the look of the sofa without it, too.
- Cut (10) 25″ 1x2s
Use wood glue and nails to nail through the 2x4s into the sides. I honestly eyeballed the placement and then made sure they were straight across. The top slat is 1.75 inches below the armrest. the next 3 pieces are spaced an inch apart. and the bottom piece is 3.5 inches up from the ground. Like I said- very little rhyme or reason… I just went for it.
It helps a lot if its a really tight cut, if you have to nudge the piece in a little, it will hold itself in place while you nail.
Make sure to hold the nail gun as straight as possible for this. I had to pull out and patch a couple of spots where I had rouge nails pop out of the sides.
Lets Finish this DIY Outdoor Sofa
Finally, the build is done! Now we get to finish it all! Fill the big holes at the top of the arm rests with plastic wood. Fill the rest of the holes with either plastic wood or wood filler.
Let dry and then do a quick sand.
After that, wipe it clean of dust and apply a pre stain conditioner.
Next, Apply your stain! I used Home Depots Behr Semi-transparent Outdoor Stain and Sealer in the color Taupe.
This tutorial was inspired by a tutorial by Angela Marie. You can find her full tutorial here.
What about the Cushions?
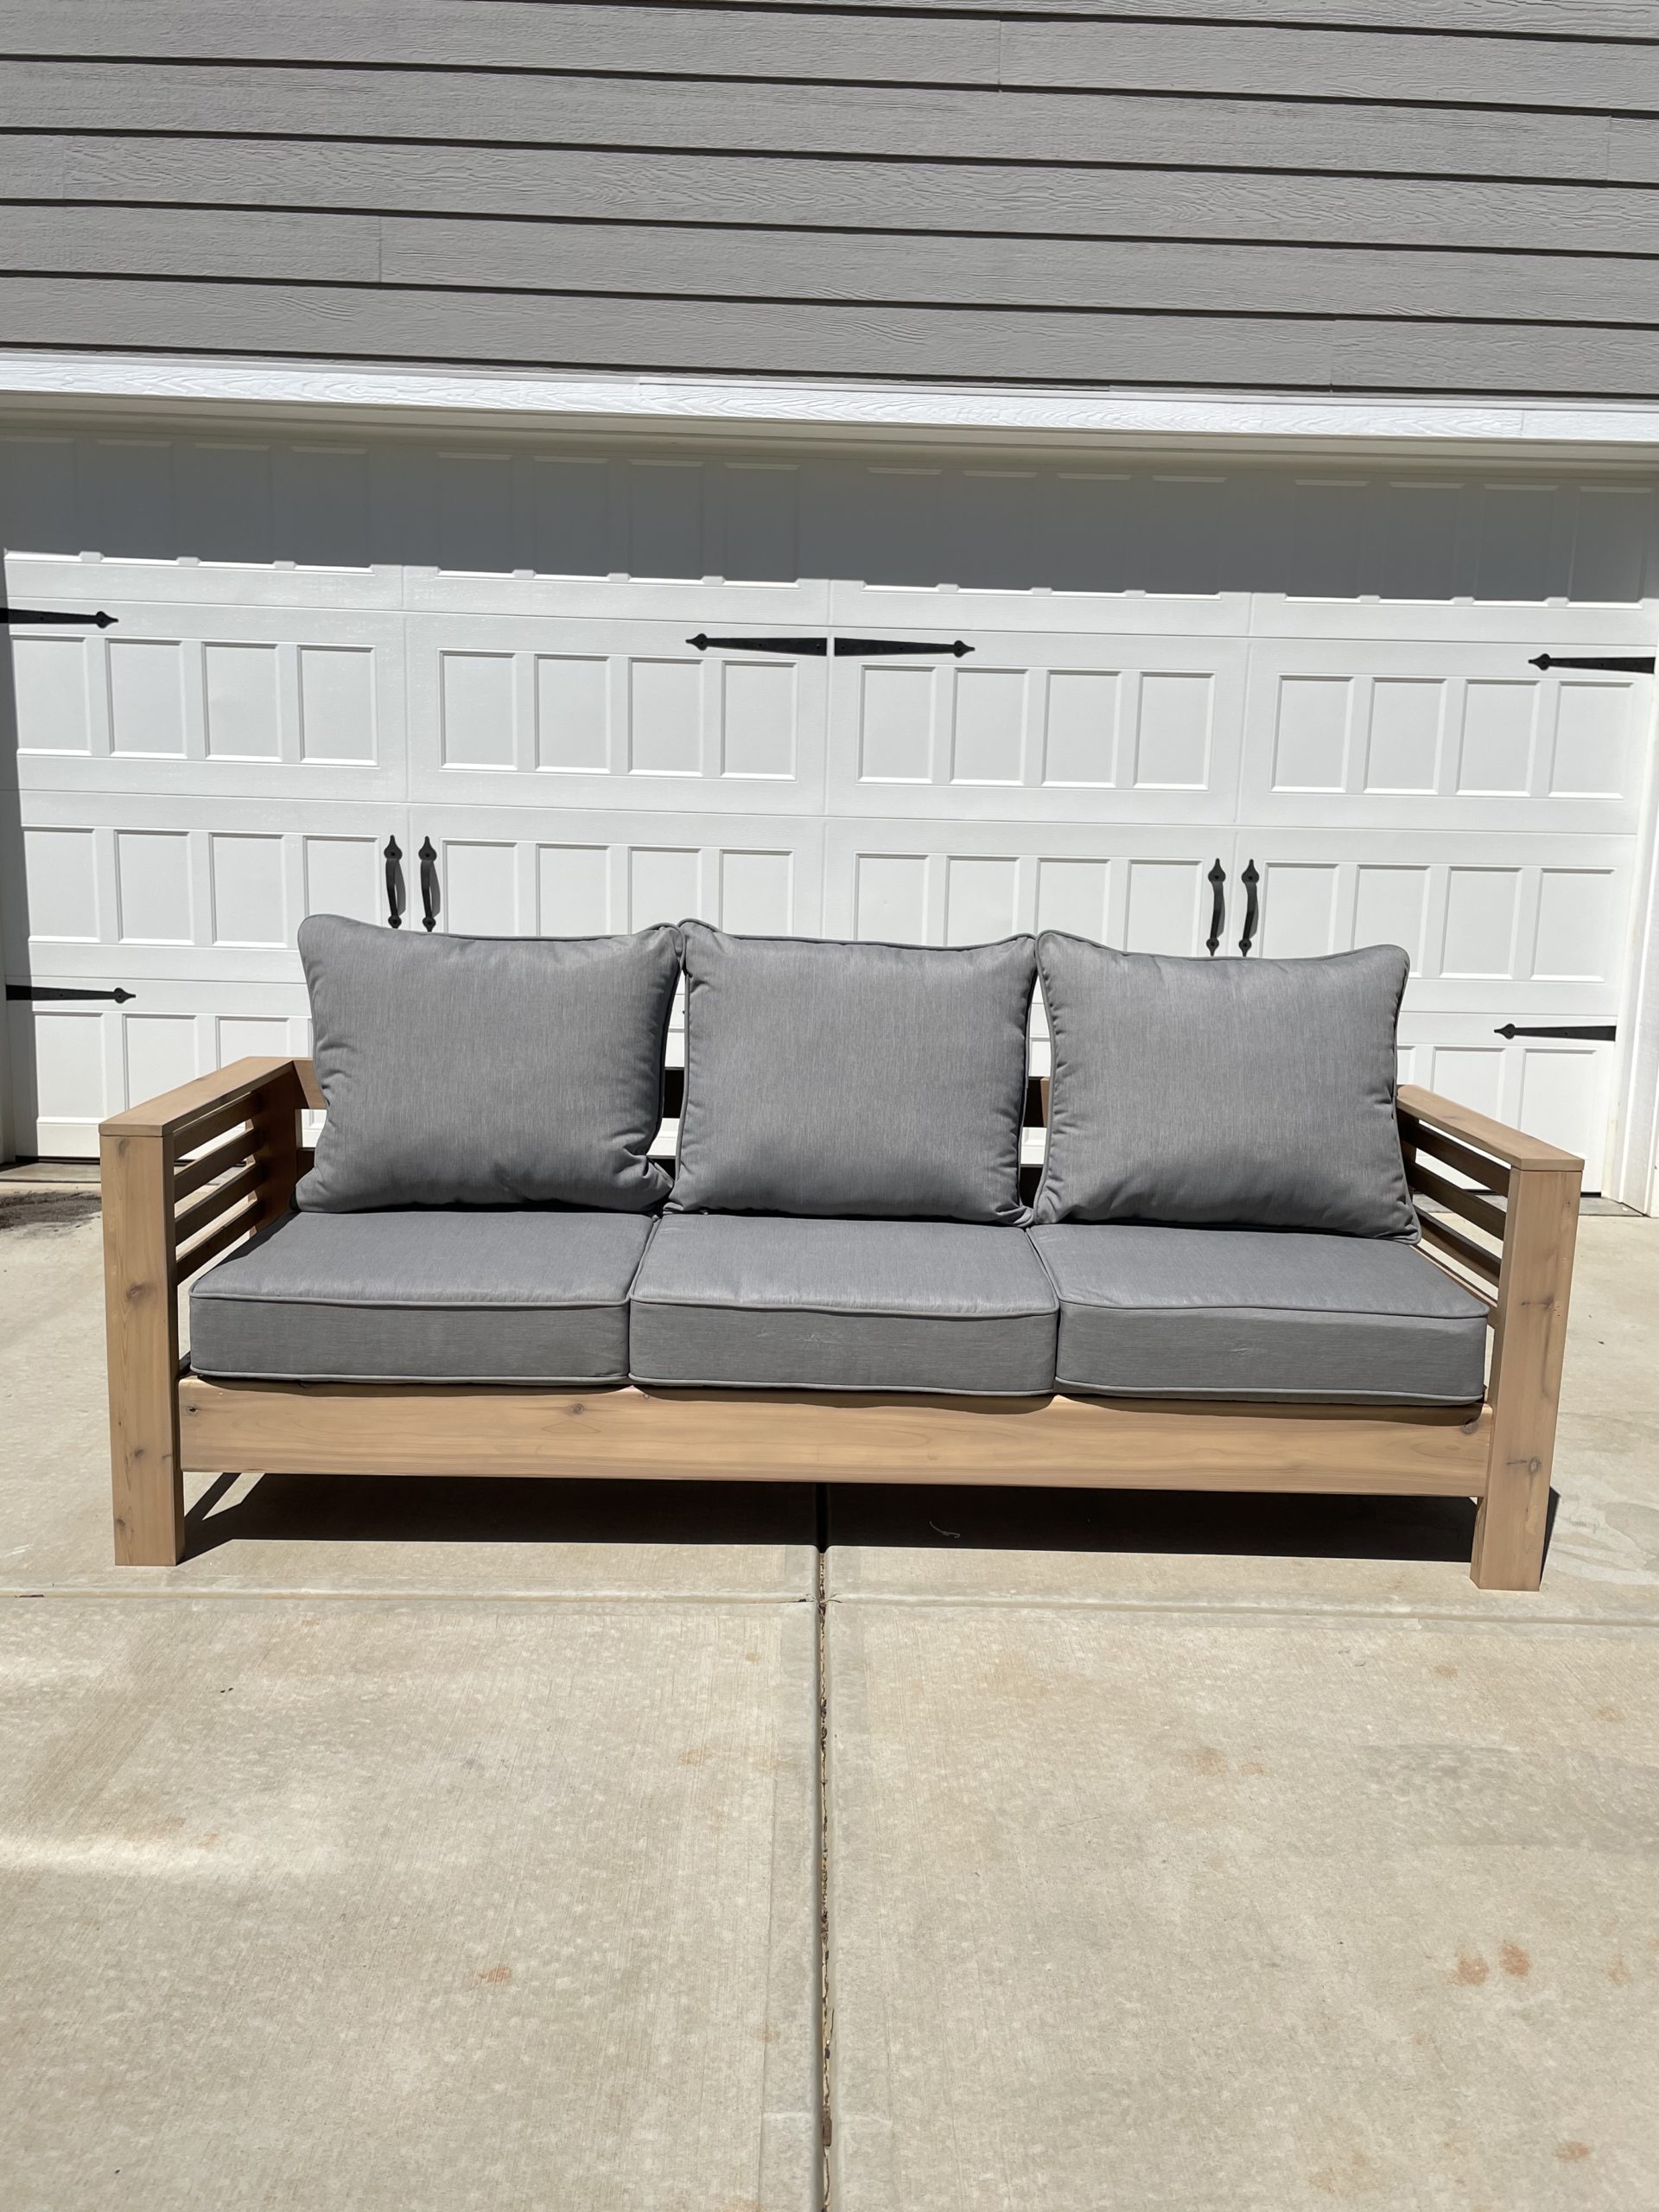
These are the cushions I decided on. Outdoor cushions are not cheap, period. But after looking around I felt like these were a great mid grade option.
You can go cheaper, with these. Or more expensive with these ones I really wanted.
Just know that if your cushion size changes, you need to adjust your cuts and measurements for the entire sofa so the cushions fit well.
Budget Breakdown
This was possibly the first and most asked question I got…”but how much did you spend?!”
So, here is a breakdown of what I spent, excluding tax:
$260 wood 😢
$20 stain
$189 cushions
=$469 Total
Of course, you can use other varieties of wood for this project to make it more affordable. As a cheaper alternative you can use normal pine lumber or pressure treated wood instead of Cedar.
The breakdown for both of those is very comparable, but looks something like this:
$107 wood
$20 stain
$189 cushions
= $316 Total
If you need to purchase the other supplies (I already had these) such as screws, nails, etc. I would plan for another $30ish.

8 Comments
t shaw
What type of wood did you use?
Haylee Griffin
I used Cedar!
Swati
Do you think the height of this seating is very low? How do you feel when you sit on it? From the pictures i feel it’s lower than standard height but i may be wrong. Let me know.
Thanks
Haylee Griffin
Hi! The seat is a bit lower for a more modern feel. I used the same seat height as the west elm inspiration sofa I shared, which is 11 inches. You can easily adjust to make it higher if you’d like!
Michael G
I have a question about the back wood and the top cushion .. when sitting down is there enough back support since your bottom cushions sit really high?
Would you reccomend lowering the sofa seat height and leave the back height?
Thanks!
Haylee Griffin
Hi Michael! The seat already sits pretty low with its modern design so I wouldn’t lower the seat height. If you are wanting more back support I would increase the height of the back a bit. The cushions do come up higher than the wood back so as you lean back they kind of squish over the top of the wood, if that makes sense!
Harmony
Wow!!!! Absolutely love the detail you have shared!!!!
I’ve favourited those exact couches but the price tag left me super sad since we have so much Reno still to do and cannot justify the purchase 😓
So good to see the exact wood, measurements, methods as well as overall estimated cost.
Thank you for taking the time to put this together 🤗
Haylee Griffin
Hi Harmony! Thank you so much! Feel free to reach out with any questions you have!