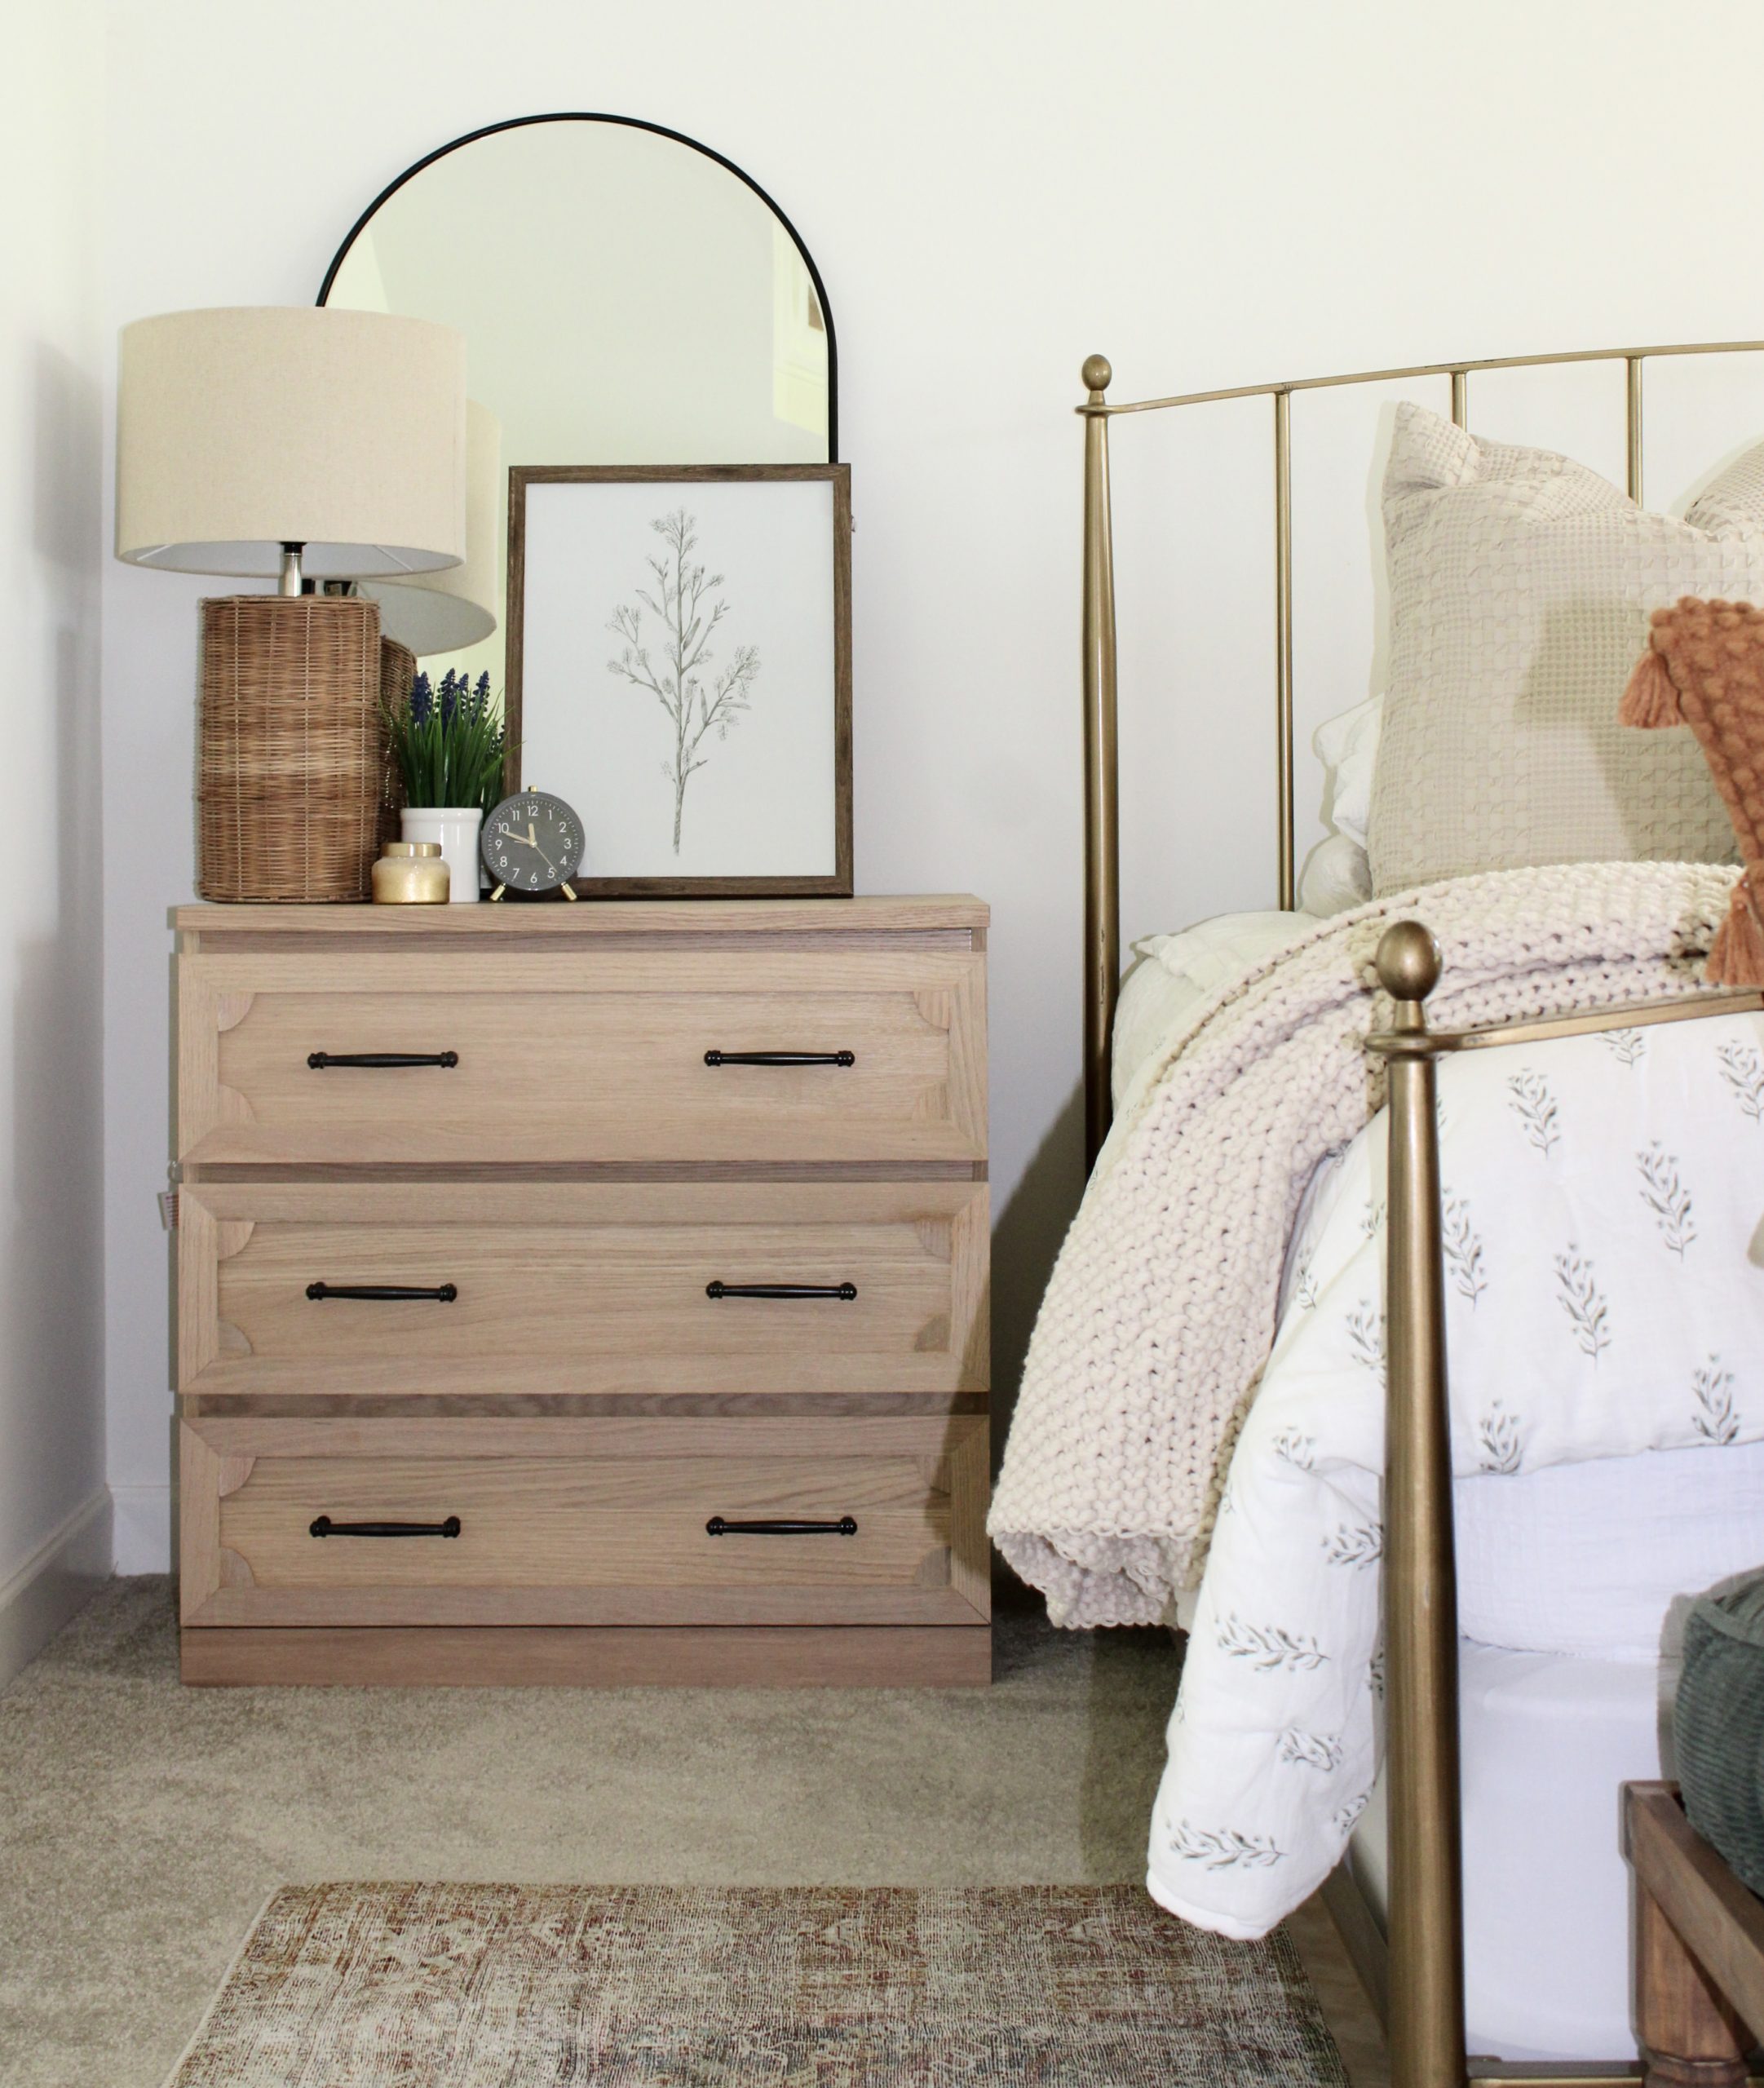
IKEA Malm Hack- Our New Nightstands are a Game Changer
The Ikea Malm dresser in oak was out of stock for months, but finally came back in so I jumped on buying two for our master bedroom.
I met a local friend on Instagram, Patti, who is an Interior Designer. You can check out her Instagram here! Her master bedroom is gorgeous and the source of my nightstand inspiration. She taught me the value of having a more substantial piece next to a bed, especially a king size bed. While our old nightstands were great, changing to two small dressers made a huge difference in the room! I moved the nightstands to my daughters room where they are the perfect size next to her twin size bed. Scale can make such a difference in interior design!
Ikea Malm DIY Hack
You can absolutely buy an Ikea malm dresser, do nothing to it and it will act as a great nightstand.
If you want to up the look a little, you can add your own cabinet hardware.
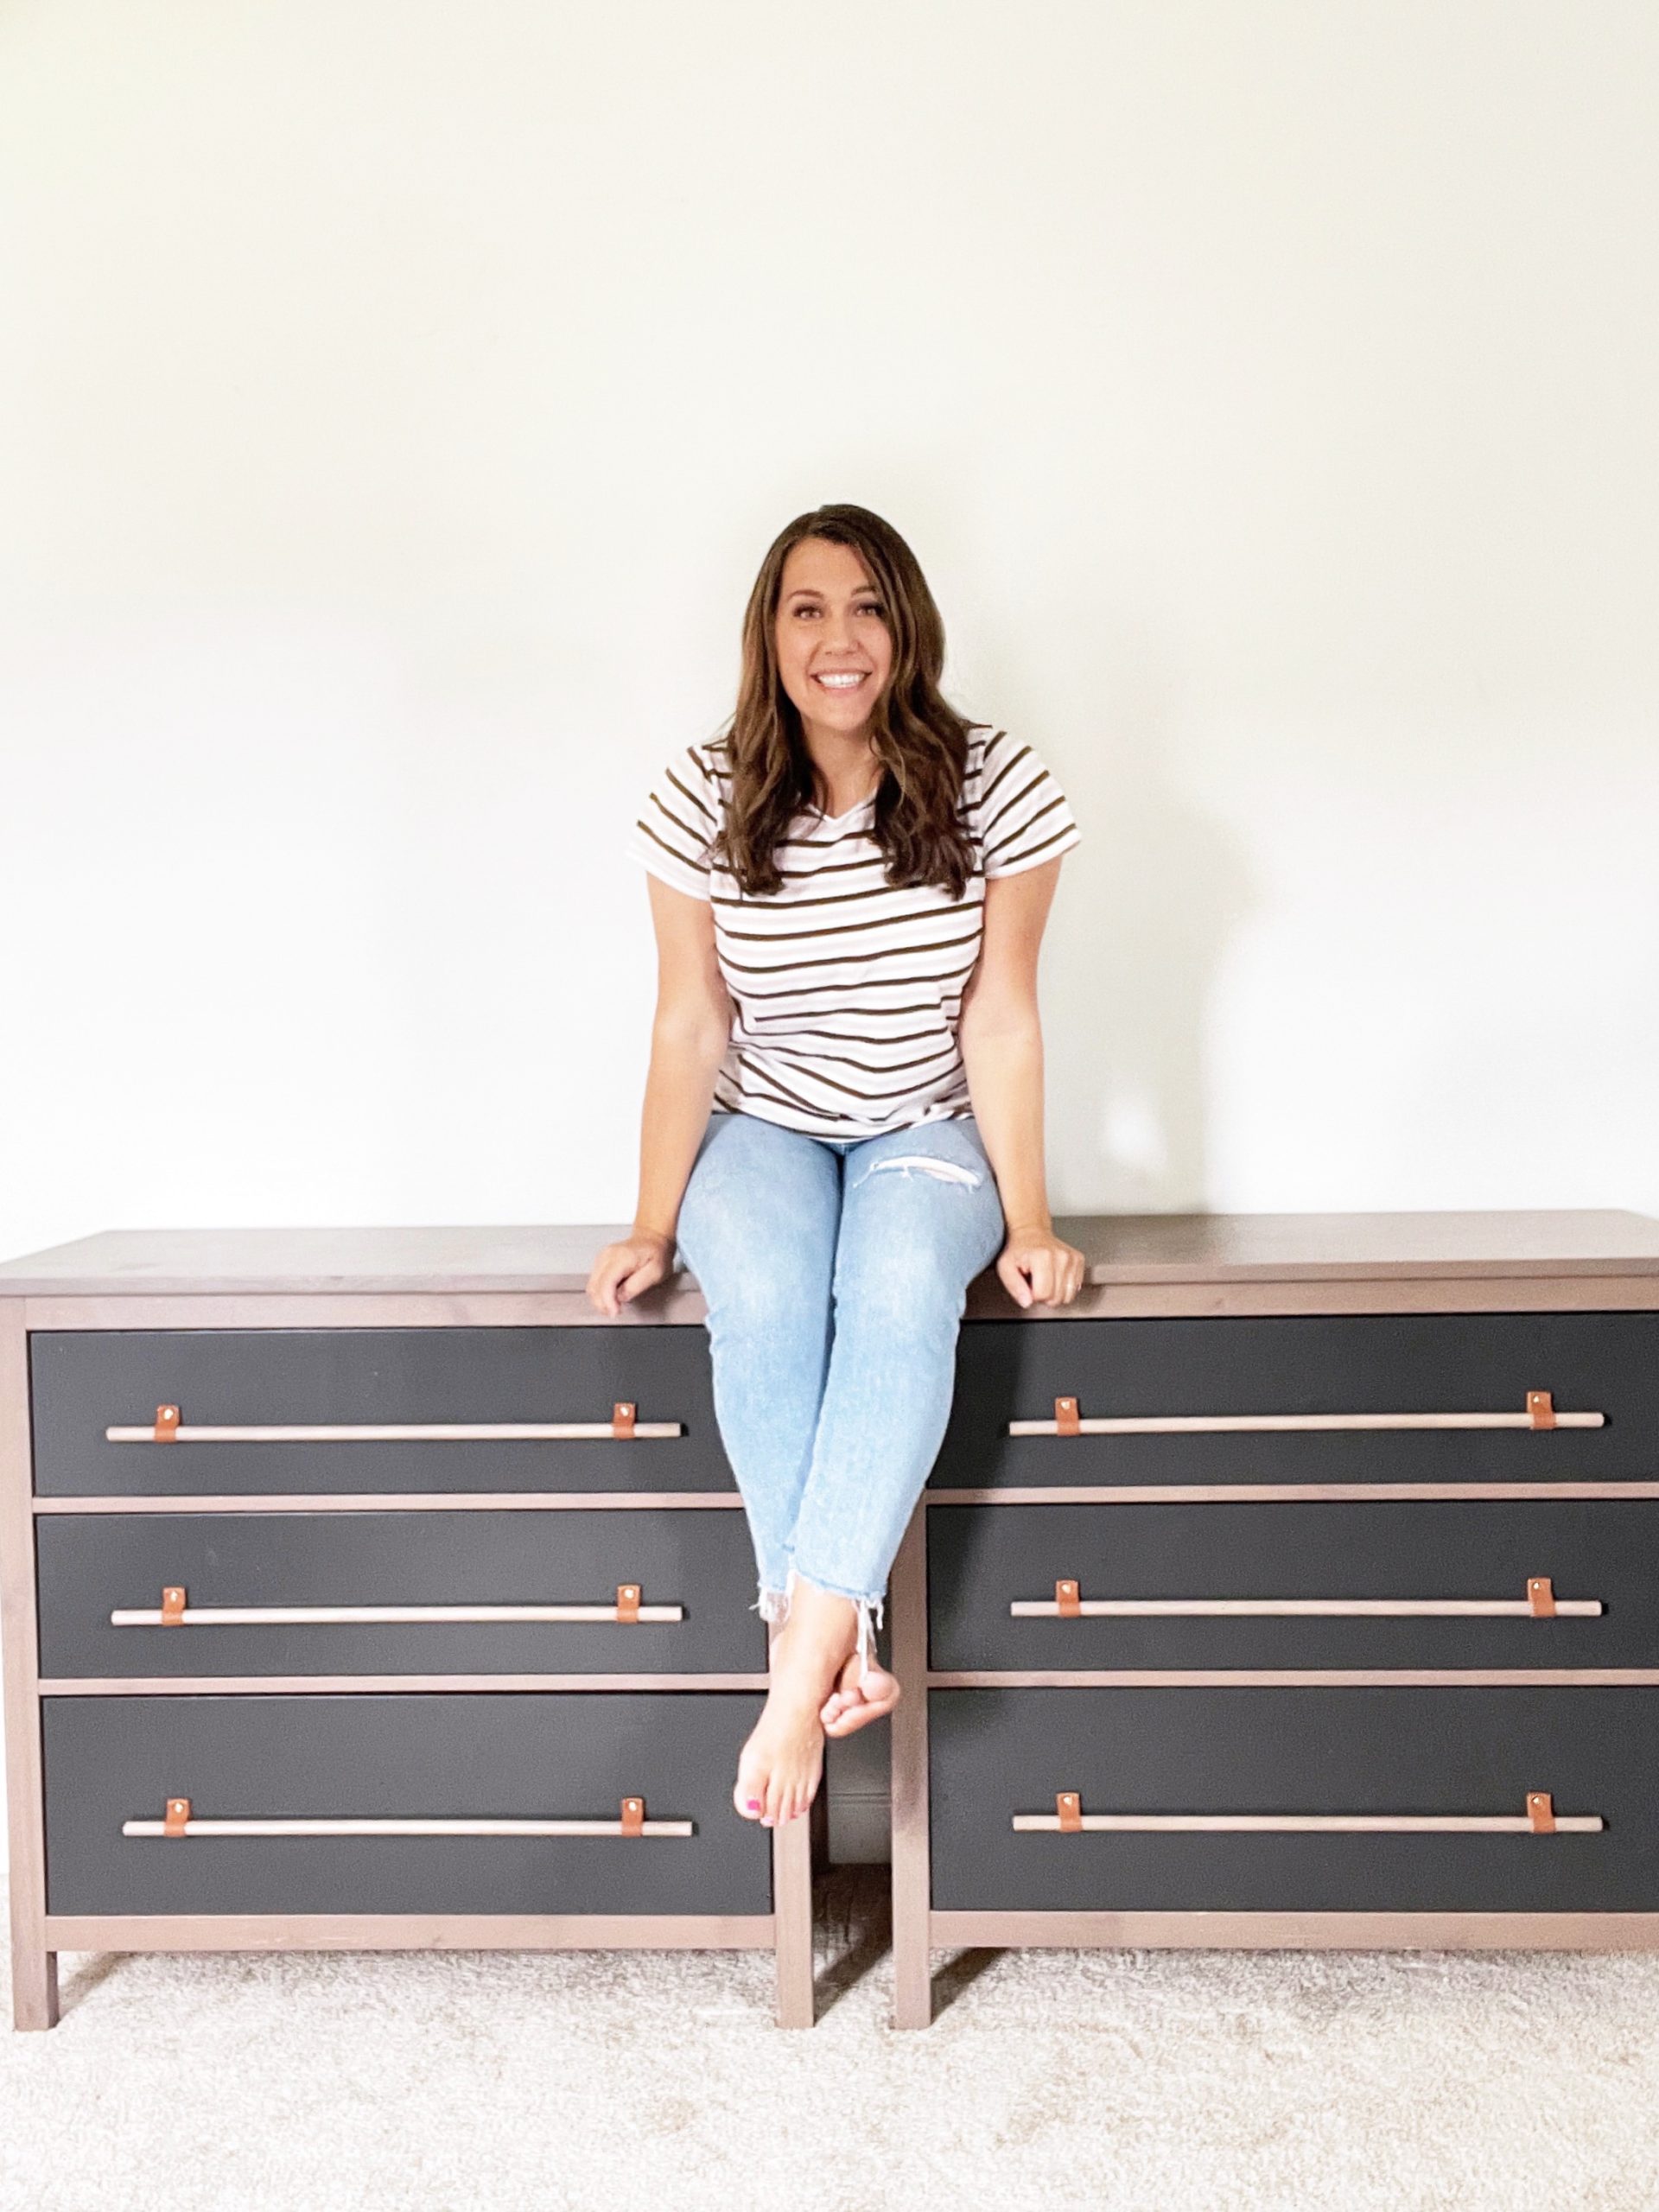
But if you want a unique look, for a fraction of the cost of buying something comparable, you can add hardware and DIY trim for a game changing outcome.
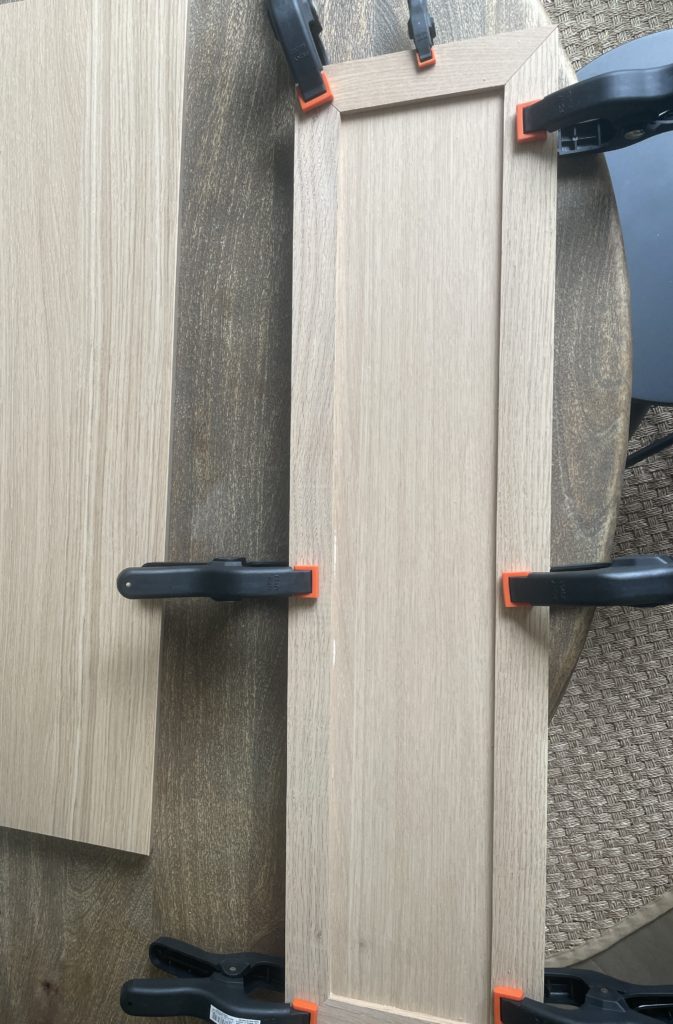
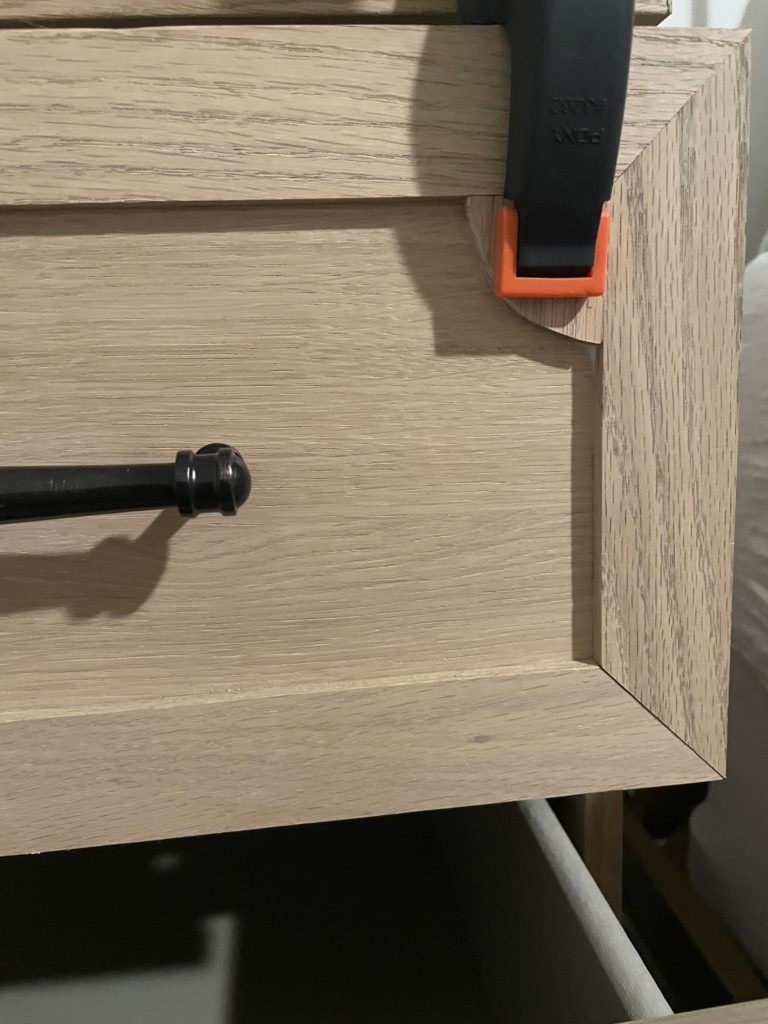
On our ikea malm dressers, I added a shaker detail around the edges of the drawers, and a little rounded detail in the corner of each. I installed them with wood glue and clamps and added some hardware for a completely new look!
Supplies for IKEA Malm Dresser Hack
- (2) Ikea Malm Dressers
- (12) 1/4-in x 2-in x 4-ft square edge unfinished Oak boards
- Stain- My special stain combo: Behr exterior Solid stain in Sage in sample size + Behr exterior semi tansparent stain in desert sand. OR a SW custom stain and minwax simply white. See explanation below.
- wood glue
- clamps
- drawer pulls
Lets get staining!
You will want to start by pulling the drawer fronts out of the Ikea malm boxes.
Now stain the oak trim pieces. There are two options here.
First option:
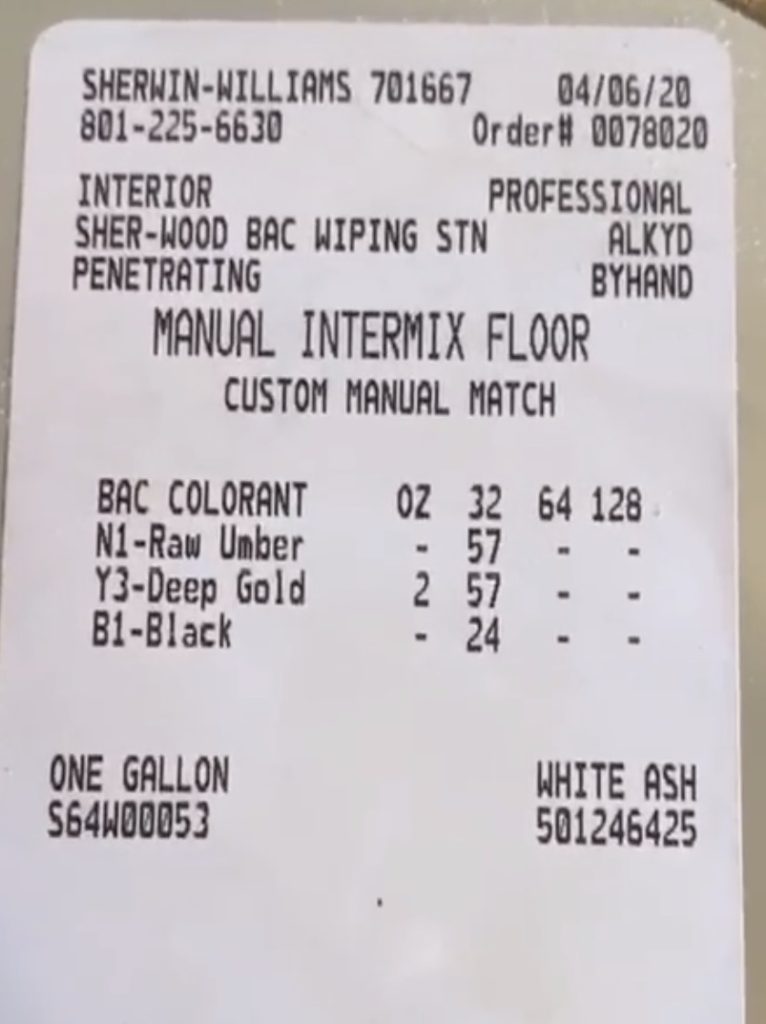
I used a pre conditioner and then a custom stain from sherwin williams immediatley followed by a coat of minwax simply white.
Here is a picture of the stain code, courtesy of Remington Avenue! I happened to have this stain leftover, but they currently only sell it in gallons and it is pricey.
Second option:
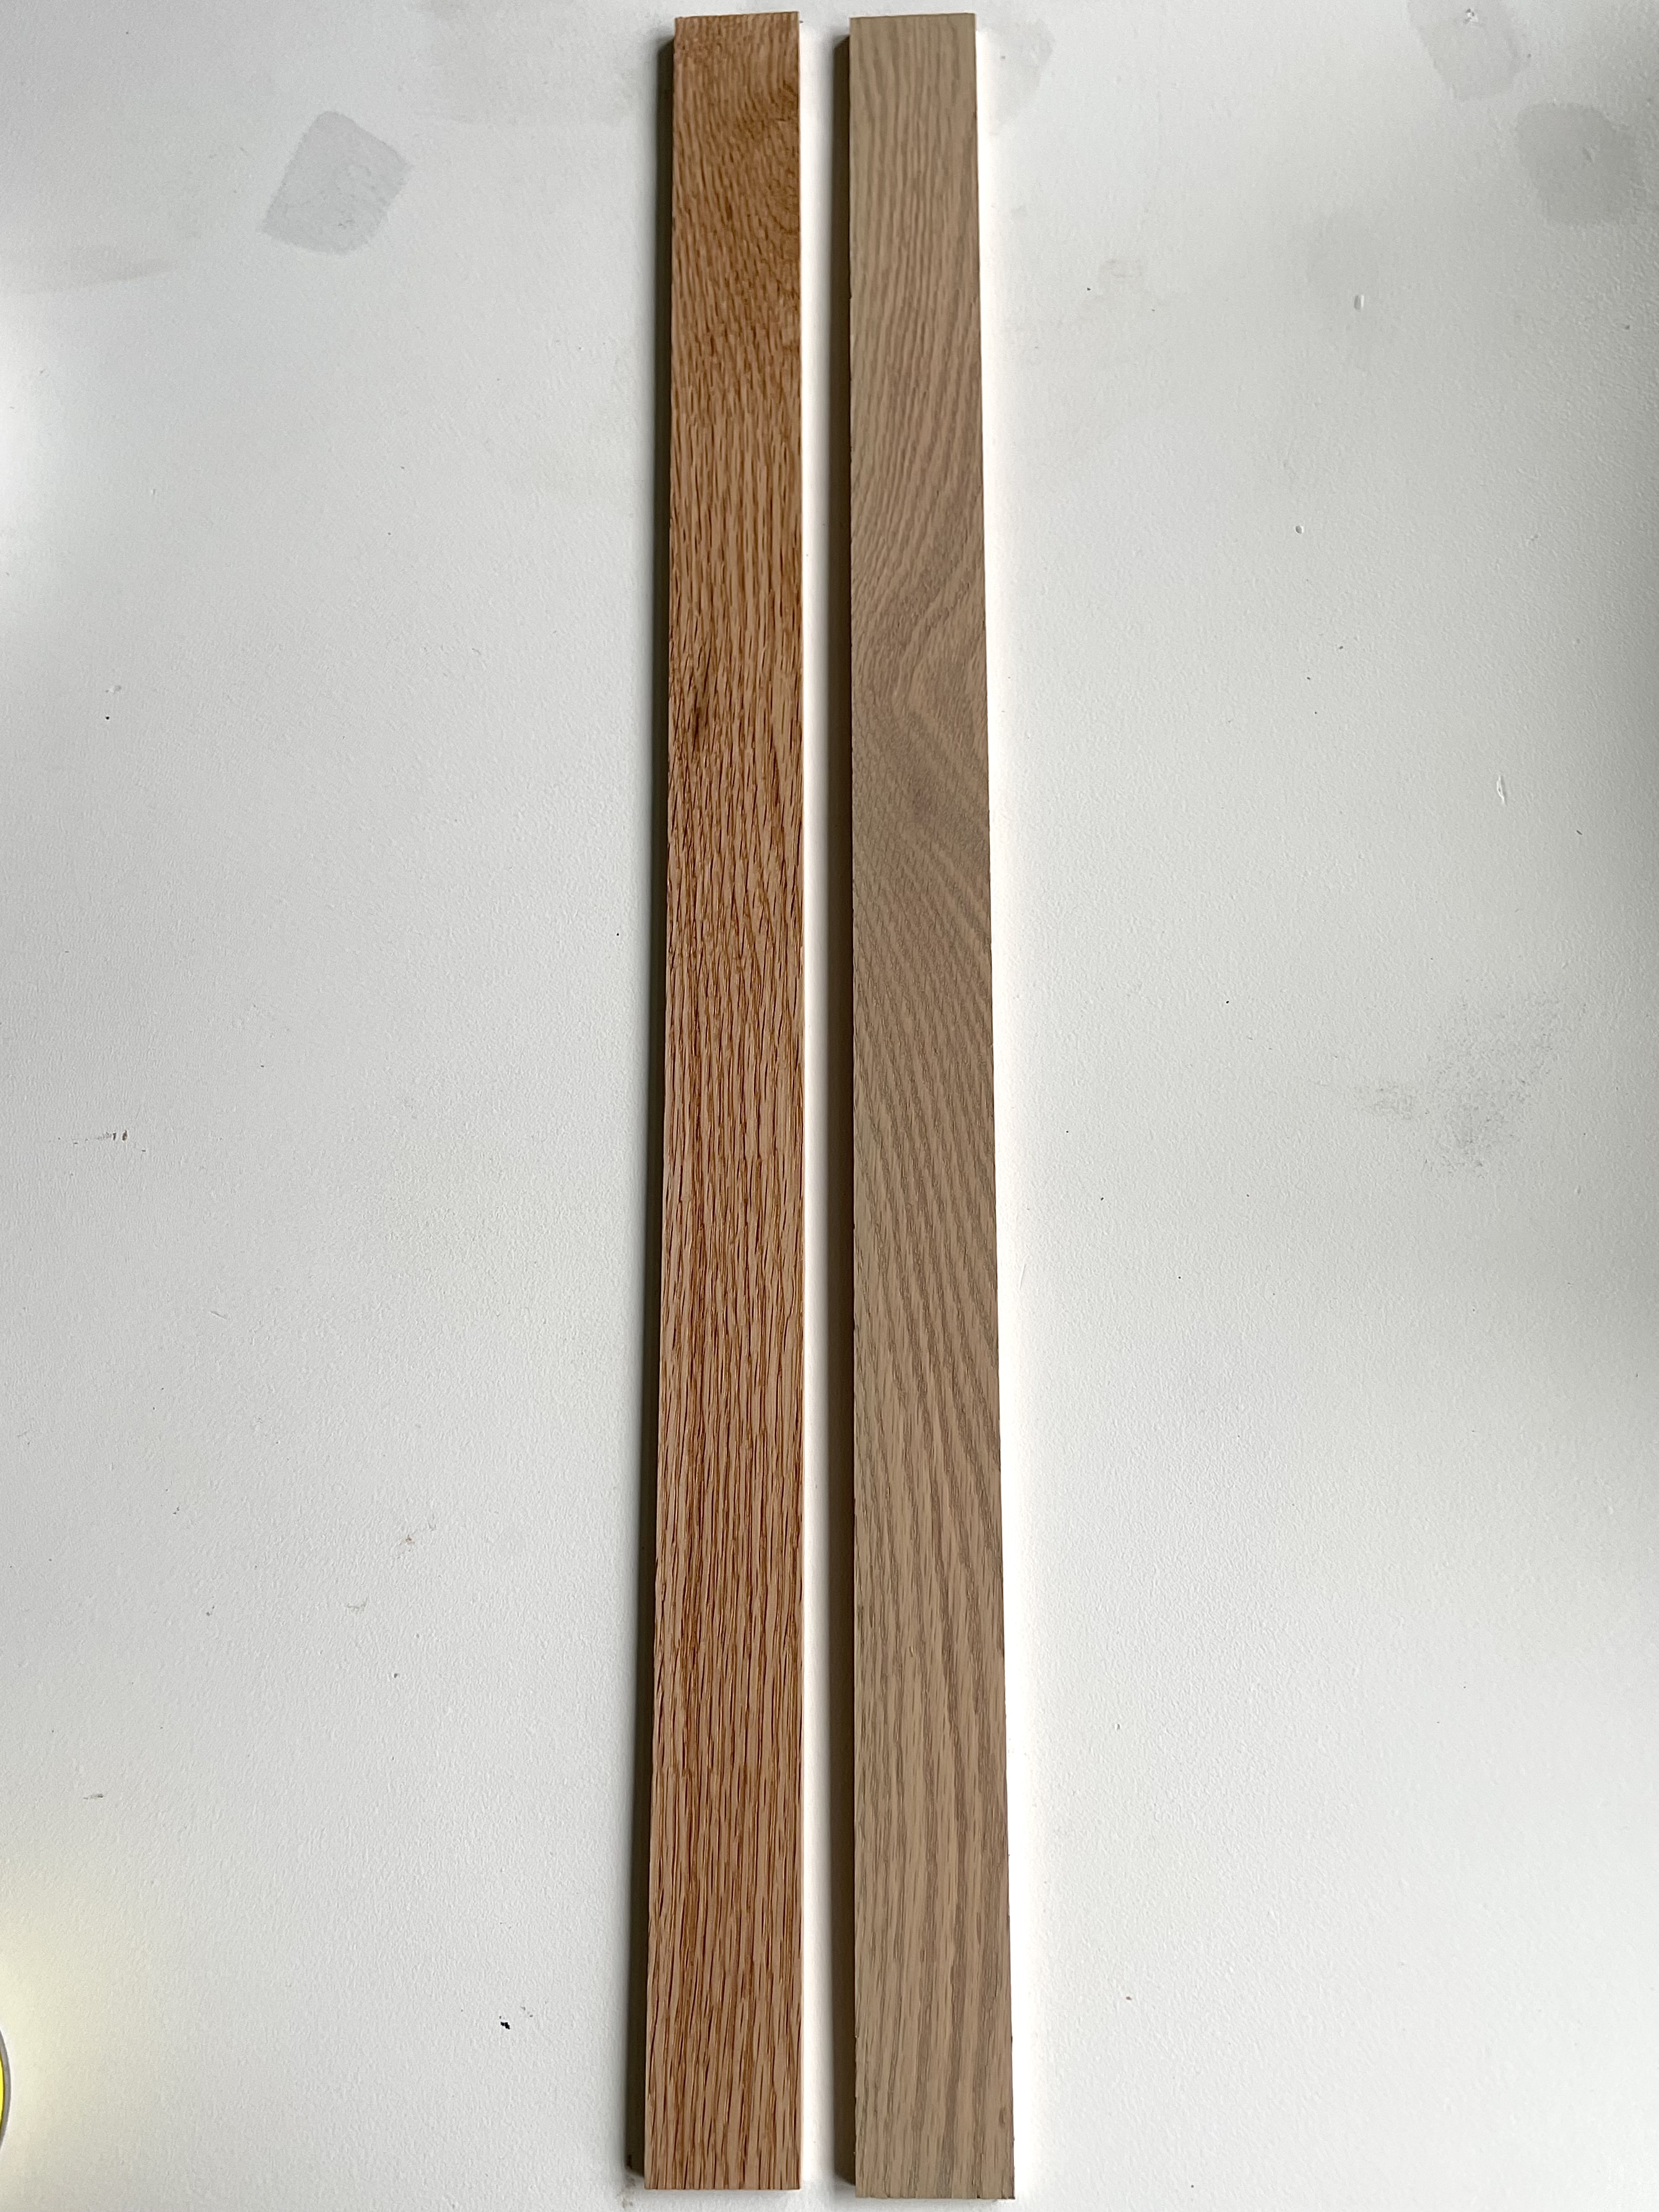
My special stain combo. I experimented to try and find a more affordable and accessible stain option that also matches. It took me 8 samples and unlimited combinations to come up with what worked, but it is a pretty good match! The key here is to use a stain that has more coverage than a traditional stain, to create a white oak look on a red oak board.
For this you will need:
Behr Solid Exterior Stain in the color Sage- sample size
Behr semi transparent exterior stain in the color desert sand
Use disposable bowls to mix 1 part Sage with 5 parts desert sand.
Apply pre conditioner and then stain combo to your wood pieces!
Installing the trim
My ikea malm drawer fronts were 31 7/16″ (the tic mark right before 1/2) wide x 8 1/16″ high. Measure yours before cutting the trim to make sure it is the same, otherwise adjust accordingly.
I chose to do a mitered corner, so cut my pieces at a 45 degree angle. You can absolutely do straight cuts instead, you will just need to adjust your measurements accordingly.
- Cut 12 pieces at 45 degree angles, 31 7/16″ long on the long ends. (28 7/16″ on the short ends)
- Cut 12 pieces at 45 degree angles, 8 1/16″ long on the long ends. ( 5 1/16″ on the short ends)
I used wood glue and a lot of clamps here. I was able to do 2 drawers at a time with the number of clamps I had. Once those two were dry, I took the clamps off and did 2 more until all 6 were done.
Because I didn’t use any nails, I used a lot of clamps per drawer to ensure proper adhesion.
Adding the rounded corner
- Cut 24 quarter circles from the scraps of leftover wood.
This part is totally optional and was very experimental on my end. I used the leftover scrap pieces to make quarter circles, cut with my jigsaw, and added them to each corner.
To mark the rounded edge, I measured 1.5 inches over and then used a cup to trace and connect that spot with the corner.
I was able to stack and cut 3 together at a time successfully. The cuts were a little messy so I sanded the rounded cuts in groups to try and make them smoother and more cohesive. They were by no means perfect, so maybe skip this if you are a perfectionist and don’t have a lot of experience with a jigsaw:)
Once they were all cut and sanded I added some stain to the rounded edge because it is exposed.
When that is dry, use wood glue to secure them in the corners of the trim.
If there are any spots where the gap between wood is not tight, fill it with wood filler.
Time for Hardware
This is the hardware I used from Home Depot. You can do two on each drawer like I did, one big pull in the middle, or something completely different!
For two:
- Drill your first hole 4 inches up from the bottom and 5.5 inches over from the side of the drawer.
- Drill the second hole 5 1/16 inches over from the first.
- Repeat 12 times haha
Ikea Malm Dresser Budget Breakdown
Ikea Malm dressers (2) $130 each = $260
Oak Trim pieces (12) $4.41 each = $52.92
Drawer pulls (12) $6.98 each = $83.76
Total Cost: $406.58 for 2
Additional: Wood Glue $5 and Clamps $ 13.98
I’m so glad you are here and want to help in any way I can! Please reach out with any questions or comments.
If you loved this tutorial you may also like this super simple IKEA Dresser upgrade from my boys room!

2 Comments
Kayleigh
Hi! Love this idea. Did you sand at all before staining?
Haylee Griffin
Hi!! I didn’t! I only stained the added trim pieces and they were bare wood and in great shape and ready to go. If you feel like yours are a little rough you can do a quick sand with fine sandpaper.