Double Board and Batten Wall-DIY-A Perfect Project for Beginners
I finally finished my boys room makeover, and it all started with the double board and batten wall! I’m going to break it down here so you can see just how easy it is to do a floor to ceiling, double board and batten wall in your home.
Supplies
1×3 Pine or MDF Boards
1×2 Pine or MDF Boards
1×6 Pine or MDF Boards (Header)
1×3 Pine or MDF Boards (Footer)- Optional
Nail gun or Finish Nails/Hammer
Liquid Nails
Level
White Caulk/Caulk gun
Wood Filler
Sandpaper block
Paint
Planning Your Wall
This is honestly the hardest part of the project. Working around all of the elements of the room, our spacing ended up being :
3/4 inch between the 1×2 and 1×3
15.5 inches between each set of boards
I added a 1×3 at the base as a footer and a 1×6 at the top for the header so I could use 8 ft boards as the battens.
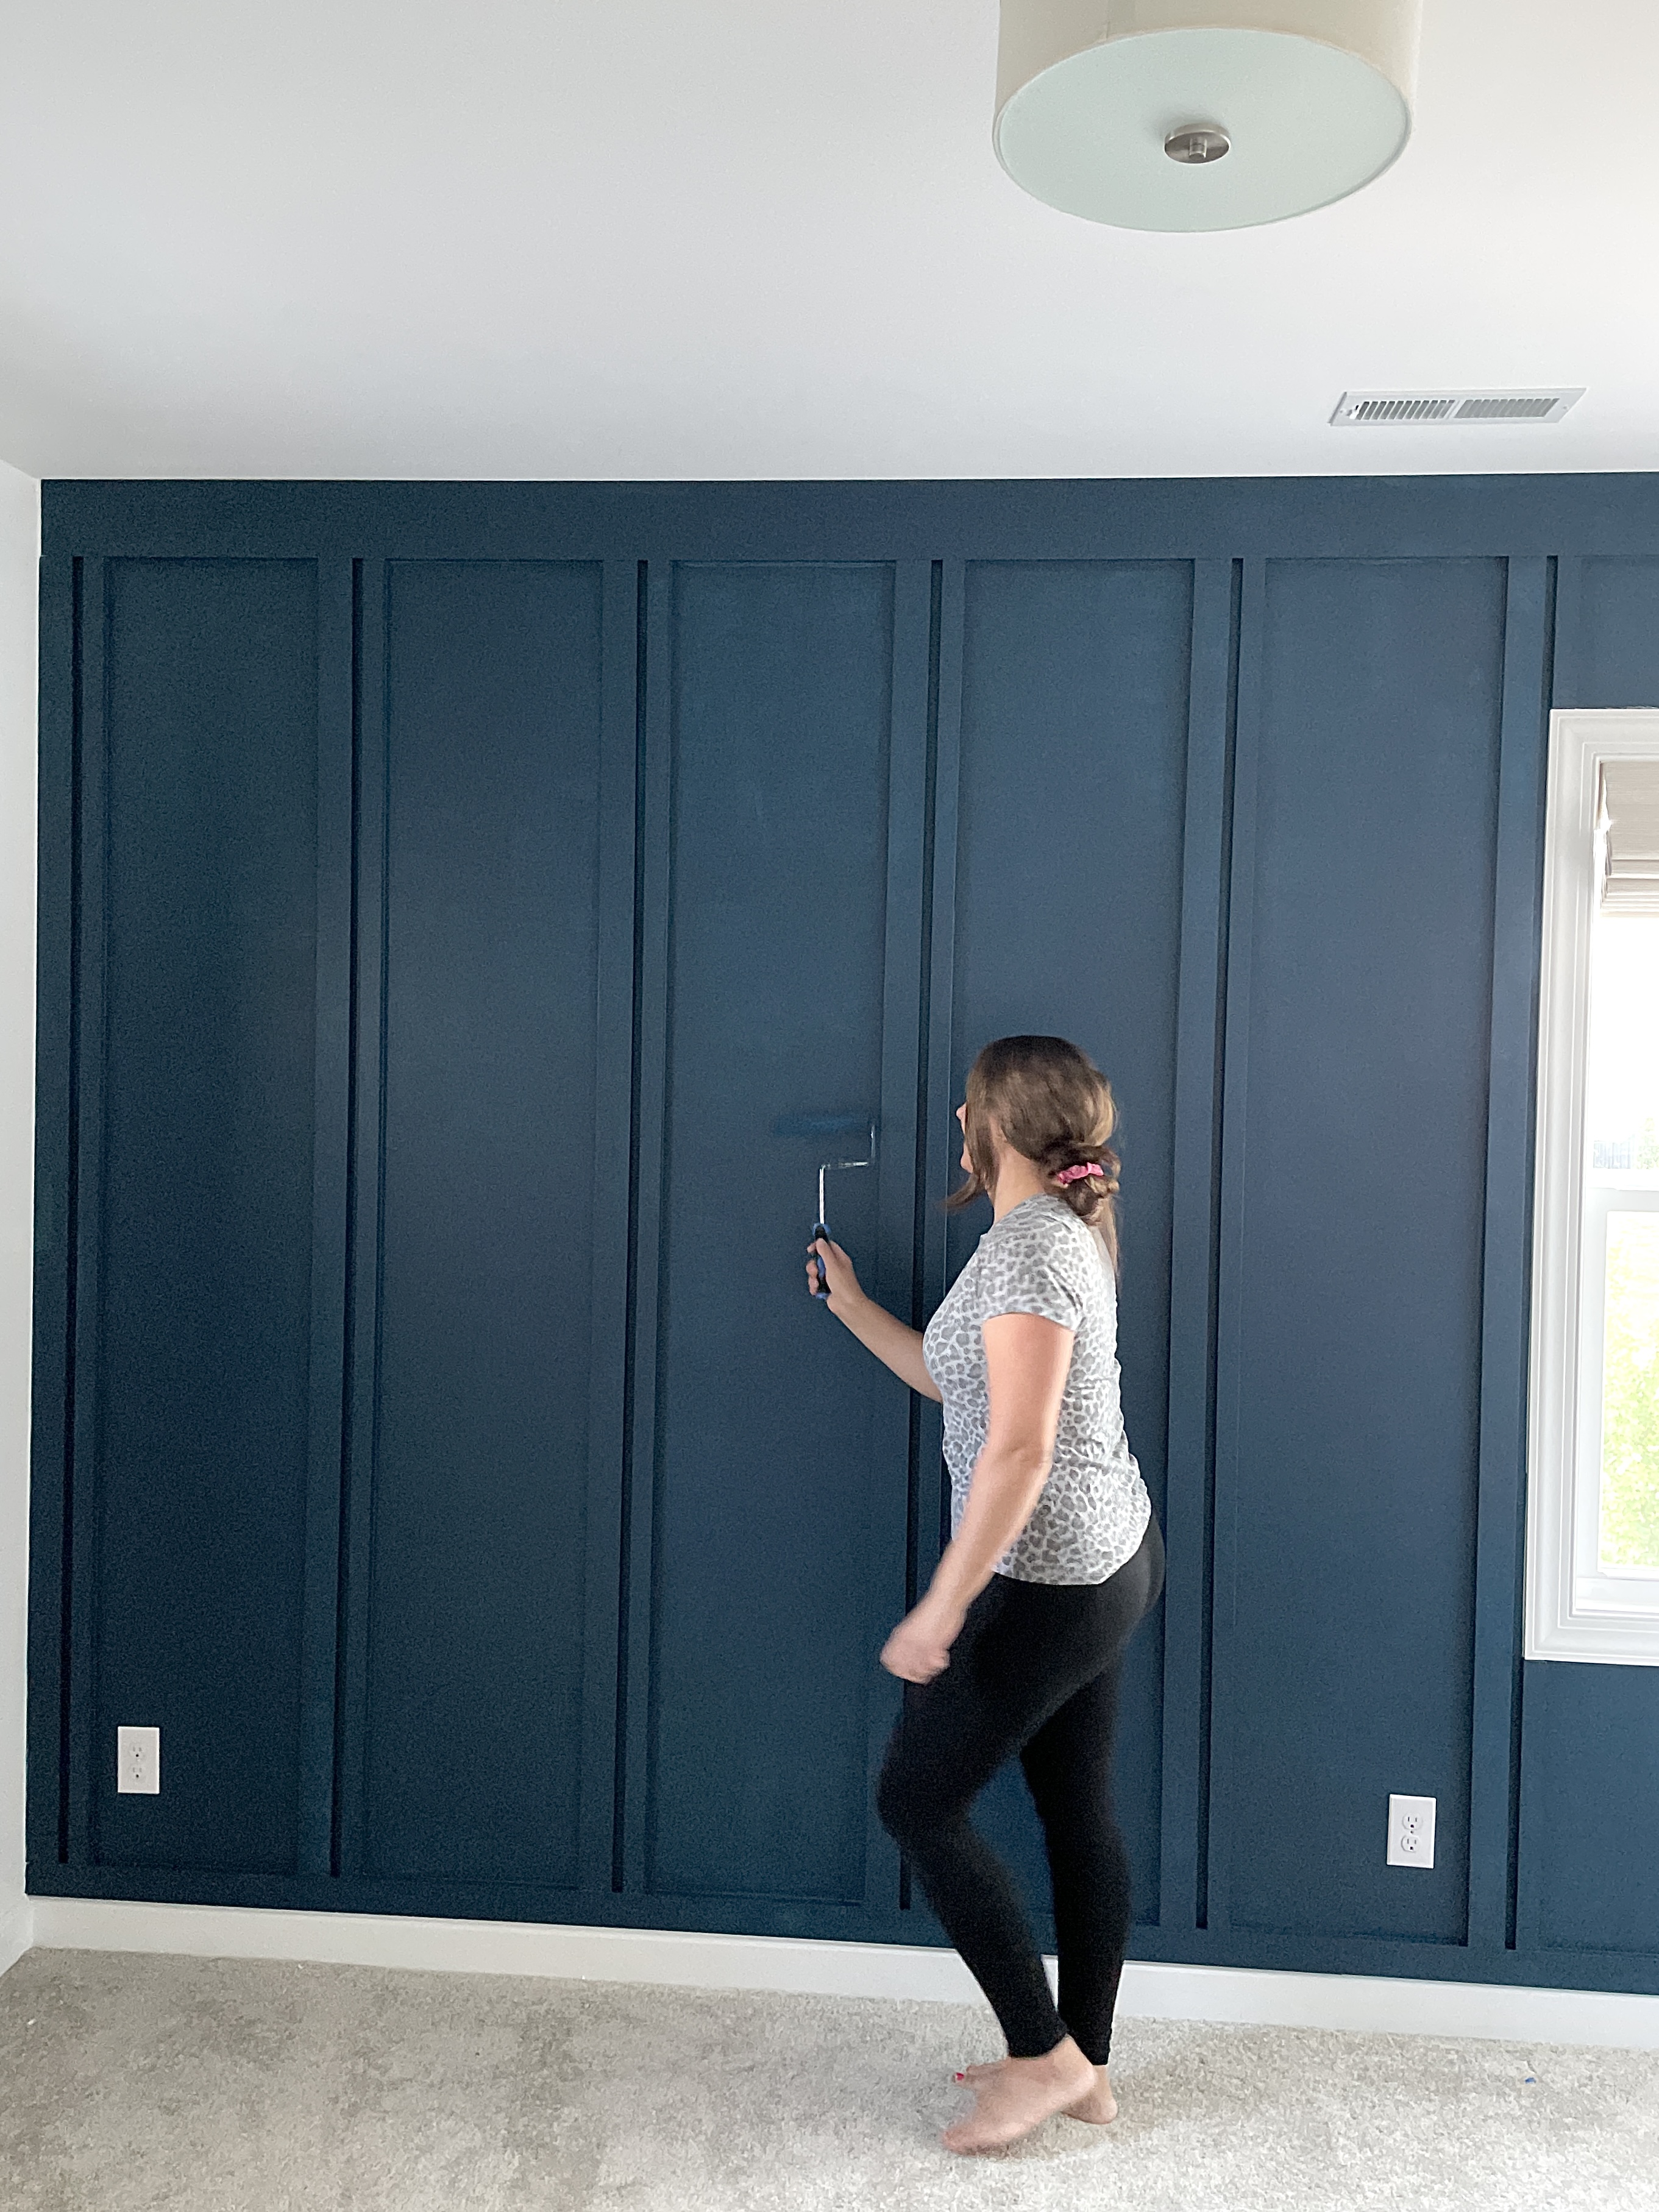
How to Install Double Board and Batten
First, nail up the header and footer (if using) boards. Use a level to make sure each is level.
Next, install the board and batten. I started with the larger, 1×3 right up against the adjoining wall. Measured a 3/4 inch gap, and then installed the 1×2.
I left a 15.5 inch gap between the end of this 1×2 and the beginning of the next 1×3.
Since these boards are horizontal, they won’t all be nailed into studs. Because of this I like to use a little liquid nails, along with a nail gun to install.
Then, repeat!
Once all boards are installed, caulk the seams and fill the nail holes with wood filler.
When the wood filler is dry, lightly sand the fronts of the boards.
Last, you paint!
TIP: I like to pre-paint the edges, and even sometimes the fronts, as much as possible. I often lay the boards all out and paint the edges at the same time. Its much easier than using a paintbrush after they are installed.
Feeling inspired, but don’t know where to start? Click here to see all of the best tools for DIY

One Comment
Jordan
I really love that you used two different board widths. It turned out so good.